
 个人中心
个人中心 退出
退出


SpringMVC
马克-to-win:SpringMVC的学习实际上可以非常简单。对于一般在公司里的工程师来讲,几乎经过半天学习就可以上手干活了。我这本教材当中也只提出几个点,大家把这几个点学会了,也可以干活了。至于没接触过的东西,到时候上网查一下就可以了。做到这点的诀窍,就是你把SpringMVC的学习和servlet的学习对比着一块儿学就可以了。因为他们都是网络项目。网络项目无非就是表单提交,session,跳转,上传,下载,线程。学习更多额外的东西,对于公司里时间就是金钱的工作环境,都是没有意义的,工程师们也都不这么干。
给一个SpringMVC的helloworld例子
1.SpringMVC的helloworld例子
马克- to-win:马克 java社区:防盗版实名手机尾号: 73203。
步骤和Servlet一样:做一个普通的dynamic web project:把所有的jar包直接拷贝到目录中就行了。不用再设置路径了。

导包图如下: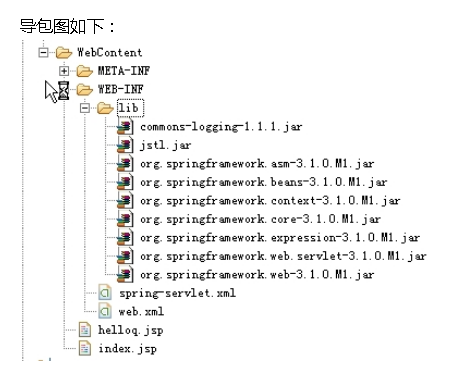
index.html:
<%@ page contentType="text/html; charset=GBK" %>
<html>
<head>
<title>Spring 3.0</title>
</head>
<body>
<a href="helloa.do">点击跳转,你好,马克-to-win</a>
</body>
</html>
web.xml:
<?xml version="1.0" encoding="UTF-8"?>
<web-app xmlns:xsi="http://www.w3.org/2001/XMLSchema-instance" xmlns="http://java.sun.com/xml/ns/javaee" xmlns:web="http://java.sun.com/xml/ns/javaee/web-app_2_5.xsd" xsi:schemaLocation="http://java.sun.com/xml/ns/javaee http://java.sun.com/xml/ns/javaee/web-app_2_5.xsd" id="WebApp_ID" version="2.5">
<display-name>MySpring30</display-name>
<servlet>
<servlet-name>spring</servlet-name>
<servlet-class>
org.springframework.web.servlet.DispatcherServlet
</servlet-class>
<load-on-startup>1</load-on-startup>
</servlet>
<servlet-mapping>
<servlet-name>spring</servlet-name>
<url-pattern>*.do</url-pattern>
</servlet-mapping>
</web-app>
spring-servlet.xml:
<?xml version="1.0" encoding="UTF-8"?>
<beans xmlns="http://www.springframework.org/schema/beans"
xmlns:xsi="http://www.w3.org/2001/XMLSchema-instance"
xmlns:p="http://www.springframework.org/schema/p"
xmlns:context="http://www.springframework.org/schema/context"
xsi:schemaLocation="http://www.springframework.org/schema/beans
http://www.springframework.org/schema/beans/spring-beans-3.0.xsd
http://www.springframework.org/schema/context
http://www.springframework.org/schema/context/spring-context-3.0.xsd">
<context:component-scan
base-package="com" />
<bean id="viewResolver"
class="org.springframework.web.servlet.view.UrlBasedViewResolver">
<property name="prefix" value="/" />
<property name="suffix" value=".jsp" />
</bean>
</beans>
package com;
import org.springframework.stereotype.Controller;
import org.springframework.web.bind.annotation.RequestMapping;
import org.springframework.web.servlet.ModelAndView;
@Controller
public class HelloWorldController {
@RequestMapping("/helloa")
public String helloWorld() {
return "/helloq";
//也可工作 return new ModelAndView("/helloq", "message", "你好");
}
}
根目录的helloq.jsp
<%@ page contentType="text/html; charset=GBK" %>
<html>
<head>
<title>Spring 3.1 Hello World </title>
</head>
<body>
你好,马克-to-win
</body>
</html>
在上面的实验中:index.jsp中当点击helloa.do以后,因为在web.xml配置说所有的do后缀的请求都要被 org.springframework.web.servlet.DispatcherServlet处理,它里面规定要按照spring- servlet.xml的配置走。spring-servlet.xml里面的<context:component-scan base-package="com" />说明Controller在com目录下。HelloWorldController里面有句话:@RequestMapping ("/helloa"),说明你的helloa.do这个请求将由这个类的这个方法处理。return "/helloq"; 这句话的意思是:告诉Spring系统,我要去helloq.jsp。helloq.jsp一定在/里呢,根据配置文件。配置成<property name="prefix" value="/"/>,return的时候写 return "helloq";而不用写成return "/helloq";也可以工作,就回到根目录下的helloq.jsp,其他的比如 return “WEB-INF/views/register” 就可以找到 WEB-INF/views 下面的 register.jsp。
 分类导航
分类导航