第六章 线程Thread


第一节 线程

1.线程有什么用?(视频下载) (全部书籍)
马克-to-win: 通过引入线程技术,在浏览器中你可以浏览网页的同时,播放动画和声音效果,同时在后台打印一个页面。例如老板可以同时处理工程师,秘书和清洁人员的事,这就是多线程处理机制。Within the browser,you can surf a webpage while play animation and mp3 concurrently, print a page in the background。for example: boss handle engineer,secretary,cleaner, this is multithread mechanism.


2.程序,进程和线程的区别 (视频下载) (全部书籍)

马克-to-win:程序,进程和线程的区别是什么?这个问题比较抽象难理解,但又非常重要。我并不想给出一大堆抽象的学术解释,那样只能误国误民。所以我先给大家举一个例子。马克-to-win: 2000年的时候,我比较爱用ie的老版本。当时我喜欢边上网边下载很多东西,比如很多MP3同时下。我发觉如果我打开一个ie,之后用file/new,new出很多窗口来,边看网页,边下载很多mp3的话,如果有一个下载崩溃的话,所有的ie窗口就同时都崩溃了,包括网页和所有的下载窗口。马克-to-win:后来我就学聪明了,我打开两个ie。一个ie用来浏览网页。另一个ie,file/new出很多新的窗口。这样如果下载出问题了,下载的ie会崩溃。但浏览网页的ie依旧完好的工作。在上述例子当中,ie就是一个应用程序,后来我打开两个ie,就是打开两个进程。这两个进程,在内存中分别占有不同的代码空间。马克-to-win:所以一个进程崩溃不影响另外一个。后来从其中一个ie, file/new出很多个新窗口。每一个窗口就是一个线程,线程在内存当中是没有自己的代码空间的。它只能依附于进程存在。马克-to-win:所以,这个进程当中的一个线程窗口崩溃了,所有依附于这个进程的线程窗口就都崩溃了。相对于进程来讲,线程非常轻量,非常节省资源。我经常同时打开二十个窗口,下载各种音乐mp3。反正是线程,不占资源。马克-to-win:线程在内存当中没有自己的代码空间。只有程序计数器。一个线程可能执行到所依附进程的1000行,另一个线程,可能执行到第99行,这两个线程,虽然依附于同一个主进程,但他们各自执行各自的,相互不影响。马克-to-win:仔细揣摩我上面说的故事,你就会理解,程序,进程和线程的区别。给点抽象的话:程序是硬盘上的一个文件,是一个机器代码和它的数据的集合。进程是程序在内存上的一次运行活动,占代码空间。线程是依附于进程,靠程序计数器能独立运行,轻量独立运行单元。

线程间(因为使用程序计数器)的切换成本比进程间切换成本低,所以使系统的空转时间少,提高CPU利用率。

3.线程技术基础

主线程

马克-to-win:根据java的语法(sun公司当初就是这么设计的):在Java程序启动时,一个线程立刻运行,该线程通常称为程序的主线程(main thread) 。 主线程的重要性体现在两个方面: 它是产生其他子线程的线程。 通常它必须最后完成执行,因为它执行各种关闭动作。我们从第一章helloworld开始,其实就已经创建了主线程,只不过我们没有着重提。现在我们研究一下:


例:1.3.1-本章源码
public class Test {
    public static void main(String args[]) {
/*Thread.currentThread();把当前的线程参数取回来, 放在t中, 当前的线程其实就是主线程,线程参数包括线程名称,程序计数器等*/
        Thread t = Thread.currentThread();
/*打印的结果是线程名称,优先级, 线程组。
 public String toString()Returns a string representation of this
thread, including the thread's name, priority, and thread group.
*/
        System.out.println("当前线程是: " + t);
/*改变了主线程的名字*/
        t.setName("马克-to-win的线程");
        System.out.println("当前线程名是: " + t);
    }
}

输出结果:
当前线程是: Thread[main,5,main]
当前线程名是: Thread[马克-to-win的线程,5,main]

java创建子线程为什么要有两种方法?  (视频下载) (全部书籍)
马克-to-win:通过以下两种方法创建子线程:1)声明一个Thread类的子类。 2)实现runnable接口。java的官方文档也没强调这二者有什么区别。马克-to-win:笔者认为,既然java只允许继承一个类,如果你这个类本身就是某个类的子类,那你要想创建子线程,你就只能实现runnable这个接口。

例:1.3.2-本章源码
class ThreadMark_to_win extends Thread {
    public void run() {
        for (int i = 0; i < 3; i++) {
            try {
                Thread.sleep(1000);
            } catch (InterruptedException e) {
                e.printStackTrace();
            }
            System.out.println("子线程i = " + i);
        }
    }
}
public class Test {
    public static void main(String[] args)  {
        Thread t = new ThreadMark_to_win();
        t.start();
        for (int i = 0; i < 3; i++) {
            try {
                Thread.sleep(1000);
            } catch (InterruptedException e) {
                e.printStackTrace();
            }
            System.out.println("主线程i = " + i);
        }
    }
}
输出结果:
主线程i = 0
子线程i = 0
主线程i = 1
子线程i = 1
主线程i = 2
子线程i = 2

马克-to-win:对于以上例子的解释:1)根据语法:在start以后,子线程被启动,run方法被运行,与此同时cpu继续执行主线程的for循环,这就是多线程的奥妙之处,所以当我们看结果时, 我们看到主线程和子线程交替输出, 如果子线程被挡住了,主线程是不受干扰的,这也是多线程的奥妙之处。马克-to-win:在程序中,如果我不让它睡觉停顿一秒钟。CPU来不及切换就执行完了,大家看不出效果。大家还以为是顺序执行的呢!其实是主子线程交替执行的。2)马克-to-win:当我的ThreadMark_to_win继承了Thread以后,为什么一start,run 就被运行,我们可以猜一猜sun公司是怎么实现的这一切?其实这就用到了我们前面学过的多态,当父类指针指向子类时,当子类ThreadMark_to_win没有start方法时, 就执行父类Thread的start方法, Thread的start方法说,执行子类run方法,(我们的ThreadMark_to_win正好编了run方法) 而且继续主线程的下一句,于是就是我们前面看到的并发效果。

马克-to-win:更有甚者,我们观察下面的两个例子会发现:甚至当子线程抛出异常,子线程戛然停止崩溃时,主线程都不会受影响继续运行,整个程序也照常运行,不会崩溃。反之亦然,主线程戛然停止崩溃时,整个程序不受影响,子程序照常运行。

为什么抛出异常,别的线程还是能运行呢?想象一下程序执行的过程就明白了。jvm一句一句的向下执行,当它发现异常时,它对别的线程,还是该干什么干什么。注意现在是你的程序出现问题,jvm一点问题都没有,所以它还能正常该干什么干什么。(见下面 的例子)

例:1.3.2_1-本章源码
class ThreadMark_to_win extends Thread {
    public void run() {
        for (int i = 0; i < 7; i++) {
            try {
                Thread.sleep(1000);
            } catch (InterruptedException e) {
                e.printStackTrace();
            }
            System.out.println("子线程i = " + i);
        }
    }
}
public class Test {
    public static void main(String[] args)  {
        Thread t = new ThreadMark_to_win();
        t.start();
        for (int i = 0; i < 3; i++) {
            try {
                Thread.sleep(1000);
            } catch (InterruptedException e) {
                e.printStackTrace();
            }
            System.out.println("主线程i = " + i);
        }
        throw new ArithmeticException("divide by 0");
//后面不能再加任何语句了,会报unreachable compile error的
    }
}
输出结果:
主线程i = 0
子线程i = 0
主线程i = 1
子线程i = 1
子线程i = 2
主线程i = 2Exception in thread "main"
java.lang.ArithmeticException: divide by 0
    at Test.main(Test.java:25)
子线程i = 3
子线程i = 4
子线程i = 5
子线程i = 6

例:1.3.2_2-本章源码
class ThreadMark_to_win extends Thread {
    public void run() {
        for (int i = 0; i < 3; i++) {
            try {
                Thread.sleep(1000);
            } catch (InterruptedException e) {
                e.printStackTrace();
            }
            System.out.println("子线程i = " + i);
        }
        throw new ArithmeticException("divide by 0");
    }
}
public class Test {
    public static void main(String[] args)  {
        Thread t = new ThreadMark_to_win();
        t.start();
        for (int i = 0; i < 6; i++) {
            try {
                Thread.sleep(1000);
            } catch (InterruptedException e) {
                e.printStackTrace();
            }
            System.out.println("主线程i = " + i);
        }
    }
}

输出结果:
子线程i = 0
主线程i = 0
子线程i = 1
主线程i = 1
子线程i = 2
Exception in thread "Thread-0" java.lang.ArithmeticException: divide by 0
    at ThreadMark_to_win.run(Test.java:11)
主线程i = 2
主线程i = 3
主线程i = 4
主线程i = 5


下面介绍第二种方法创建子线程。

例:1.3.3-本章源码

class CommonClassMark_to_win implements Runnable {
    public void run() {
        for (int i = 0; i < 3; i++) {
            try {
                Thread.sleep(1000);
            } catch (InterruptedException e) {
                e.printStackTrace();
            }
            System.out.println("子线程i = " + i);
        }
    }
}
public class Test {
    public static void main(String[] args)  {
        CommonClassMark_to_win cc = new CommonClassMark_to_win();
        Thread t=new Thread(cc);
        t.start();
        for (int i = 0; i < 3; i++) {
            try {
                Thread.sleep(1000);
            } catch (InterruptedException e) {
                e.printStackTrace();
            }
            System.out.println("主线程i = " + i);
        }
    }
}
输出结果:
主线程i = 0
子线程i = 0
子线程i = 1
主线程i = 1
主线程i = 2
子线程i = 2

后续:
马克-to-win:刚这个例子的CommonClassMark_to_win只是个普通的类,并没有start方法,所以只能靠着Thread t=new Thread(cc);和线程扯上关系。输出结果和第一种启动线程的方法是一样的。

4.java线程的状态  (视频下载) (全部书籍)

新建 (new或born) : 马克-to-win: new出线程对象,还没start呢, 处于新建状态
就绪或说可运行(ready或runnable): 马克-to-win: 在start()之后,它将处于就绪状态或可运行状态,但cpu还没分配给它呢,所以还没真正运行呢。通过后面的学习可知:sleep(),join(),IO请求,同步锁释放等很多操作之后, 真正运行之前,都会回到这个状态。
运行 (Running) : 获取到了cpu,可以真正运行了, run()里的代码被运行。
阻塞 (Blocked) – 因为某种原因暂时停止运行。wait(),获取对象的同步锁之前,sleep(),join(),或者发出了I/O请求时。
死亡 (Dead) – 在run()方法已完成执行(或break,return,异常)或其 stop() 方法被调用之后(sun公司已不推荐使用,因为中断得太狠,容易引起同步问题),线程就处于死亡状态。


5.线程间互动

i)停止(stop)一个线程(靠着return, break,或异常手段) (视频下载) (全部书籍)

马克-to-win:java的官方文档说不要用stop方法来停止一个线程。因为stop方法太狠,太极端,会出现同步问题,使数据不一致。所以我们会通过设置标志,通过return, break,异常等手段来控制流程自然停止。

例:1.5.1-本章源码

class MyThreadMark_to_win extends Thread{
    private boolean stop;
    public void run() {
        for (int i = 0; i < 100; i++) {
            if (stop) {
                System.out.println("退出了");
                return;
            }
            try {
                Thread.sleep(200);
            } catch (Exception e) {
                e.printStackTrace();

            }
            System.out.println("i = " + i);
        }
    }

    public void setStop(boolean stop) {
        this.stop = stop;
    }
}

public class Test {
    public static void main(String[] args) {
        MyThreadMark_to_win mt = new MyThreadMark_to_win();
        mt.start();
        try {
            Thread.sleep(300);
        } catch (Exception e) {
        }
        mt.setStop(true);
    }
}

输出结果:

i = 0
i = 1
退出了

后续:

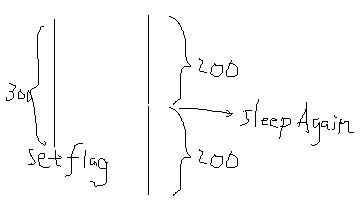
马克-to-win:如上一节例子所说: 主线程和子线程同时开始运行,主线程睡了300毫秒以后,开始把子线程类成员stop给设成真。子线程睡了两次200毫秒后正好赶上stop为真,就return了!因为没有后续程序,这个线程就结束了。


把上面的程序return,变成自己通过throw主动抛出异常,结果是一样的。 (视频下载) (全部书籍)

例:1.5.1_1-本章源码

class MyThreadMark_to_win extends Thread{
    private boolean stop;
    public void run() {
        for (int i = 0; i < 100; i++) {
            if (stop) {
                System.out.println("退出了");
                throw new ArithmeticException("divide by 0");
            }
            try {
                Thread.sleep(200);
            } catch (Exception e) {
                e.printStackTrace();

            }
            System.out.println("i = " + i);
        }
    }

    public void setStop(boolean stop) {
        this.stop = stop;
    }
}

public class Test {
    public static void main(String[] args) {
        MyThreadMark_to_win mt = new MyThreadMark_to_win();
        mt.start();
        try {
            Thread.sleep(300);
        } catch (Exception e) {
        }
        mt.setStop(true);
    }
}

输出结果:

i = 0
Exception in thread "Thread-0" java.lang.ArithmeticException: divide by 0
    at MyThreadMark_to_win.run(Test.java:7)
i = 1
退出了


ii)停止(stop)一个线程(靠interrupt手段) (视频下载) (全部书籍)

下面给出了一个主线程通过interrupt手段,来停止子线程的例子。

例:1.5.2-本章源码

class ThreadMark_to_win extends Thread {
    public void run() {
        for (int i = 0; i < 100; i++) {
            try {                                  
                Thread.sleep(100);
            } catch (InterruptedException e) {
                System.out.println("我被打断");
                return;
            }
            System.out.println("i = " + i);
        }
    }
}
public class Test {
    public static void main(String[] args) {
        ThreadMark_to_win mt = new ThreadMark_to_win();
        mt.start();
        try {
            Thread.sleep(250);
        } catch (Exception e) {
            e.printStackTrace();
        }
/*mt.interrupt();等于进入到那个线程中,抛出一个InterruptedException异常。当然那个线程的catch能捕获到了*/       
        mt.interrupt();
    }
}

输出结果:

i = 0
i = 1
我被打断


后续:

马克-to-win:本例中,主线程和子线程同时开始。主线程睡了250毫秒以后,开始打断子线程。子线程每睡一百毫秒 就打印一下。刚睡了两次打印出0 和1以后,就被主线程打断了。马克-to-win:mt.interrupt(); 意味着进入到mt那个线程中,抛出一个InterruptedException异常,这样当然mt那个线程的catch能捕获到了。

下面的例子证明,如果在子线程中开始不用
            try {                                  
                Thread.sleep(100);
            } catch (InterruptedException e) {
。。。。,

则主线程光靠mt.interrupt();是打断不了子线程的。

InterruptedException还可以用以下wait方法用,或和join方法一起用

            try {
                wait();
            } catch (InterruptedException e) {
            }


例:1.5.2_a:
class ThreadMark_to_win extends Thread {
    public void run() {
        int i=0;
        while(true) {
            try {                                 
                Thread.sleep(1);
            } catch (InterruptedException e) {
                System.out.println("我被打断");
                return;
            }
            System.out.println(i++);
        }
    }
}
public class Test {
    public static void main(String[] args) {
        ThreadMark_to_win mt = new ThreadMark_to_win();
        mt.start();
        try {
            Thread.sleep(25);
        } catch (Exception e) {
            e.printStackTrace();
        }
/*mt.interrupt();等于进入到那个线程中,抛出一个InterruptedException异常。当然那个线程的catch能捕获到了*/      
        mt.interrupt();
    }
}

结果:
0
1
我被打断

例:1.5.2_b:

class ThreadMark_to_win extends Thread {
    public void run() {
        int i=0;
        while(true) {
            System.out.println(i++);
        }
    }
}
public class Test {
    public static void main(String[] args) {
        ThreadMark_to_win mt = new ThreadMark_to_win();
        mt.start();
        try {
            Thread.sleep(25);
        } catch (Exception e) {
            e.printStackTrace();
        }
/*mt.interrupt();等于进入到那个线程中,抛出一个InterruptedException异常。当然那个线程的catch能捕获到了*/      
        mt.interrupt();
    }
}

结果:

0
1
2
3
4
5
。。。。。。。
661807
661808
661809
661810
661811
661812
。。。。。。。。。

下面给出了一个子线程通过interrupt手段,来停止主线程的例子。 (视频下载) (全部书籍)

例:1.5.2_1-本章源码

class ThreadMark_to_win extends Thread {
    Thread mainT;
    public void run() {
        try {
            Thread.sleep(100);
        } catch (InterruptedException e) {
            System.out.println("我是子线程,被打断");
            return;
        }
        mainT.interrupt();
    }
    public void setMainThread(Thread t1) {
        mainT = t1;
    }
}
public class Test {
    public static void main(String[] args) {
        Thread mainT = Thread.currentThread();
        ThreadMark_to_win st = new ThreadMark_to_win();
        st.setMainThread(mainT);
        st.start();
        try {
            Thread.sleep(250);
        } catch (InterruptedException e) {
            System.out.println("我是主线程,被打断");
        }
    }
}

输出结果:
我是主线程,被打断


下面给出了一个子线程通过interrupt手段,来停止另外一个子线程的例子。 (视频下载) (全部书籍)

例:1.5.2_2-本章源码

class ThreadMark_to_win extends Thread {
    Thread st1;
    public void run() {
        try {
            Thread.sleep(100);
        } catch (InterruptedException e) {
            System.out.println("我是子线程,被打断");
        }
        st1.interrupt();
        try {
            Thread.sleep(300);
        } catch (InterruptedException e) {
            System.out.println("我是子线程,第二次睡时被打断");
            return;
        }
    }
    public void setSilblingThread1(Thread t1) {
        st1 = t1;
    }
}
class ThreadMark_to_win1 extends Thread {
    Thread st;
    public void run() {
        try {
            Thread.sleep(200);
        } catch (InterruptedException e) {
            System.out.println("我是子线程1,被打断");
        }
        st.interrupt();
    }
    public void setSilblingThread(Thread t1) {
        st = t1;
    }
}
public class Test {
    public static void main(String[] args) {
        ThreadMark_to_win st = new ThreadMark_to_win();
        ThreadMark_to_win1 st1 = new ThreadMark_to_win1();
        st.setSilblingThread1(st1);
        st1.setSilblingThread(st);
        st.start();
        st1.start();

    }
}

输出结果:
我是子线程1,被打断
我是子线程,第二次睡时被打断

后续:
马克-to-win:在上面例子中用st.setSilblingThread1(st1);和st1.setSilblingThread(st);把子线程的指针或参考相互传递给对方后, 用和过去一样的方法互相中断线程。

iii)一个线程join另一个线程,(包括和interrupt互动的用法)

马克-to-win:join的意思就是本线程停下来,(视频下载) (全部书籍)等着另外一个线程完事,之后执行本线程的下一句话。(感觉有点像过去张三等着李四,等到后join在一起一块继续走)下面给出了一个主线程要join一个子线程的例子。

例:1.5.3-本章源码

class ThreadMark_to_win extends Thread {
    int e;
    public void run() {
        for (int i = 0; i < 4; i++) {
            e = e + i;
        }
        System.out.println("完成");
    }
}
public class Test {
    public static void main(String[] args) {
        ThreadMark_to_win tm = new ThreadMark_to_win();
        tm.start();
        try {
/*本线程停在这儿等着tm线程结束,接着执行本线程下面的程序*/                        tm.join();
        } catch (InterruptedException e) {
            e.printStackTrace();
        }
/*注意虽然tm线程结束了,只是它作为线程的状态变成了结束,但是tm作为实例还存在, 你并没有tm=null,(如果你tm=null,之后执行tm.e,会报空指针异常,)线程的状态和实例是两码事。*/        
        System.out.println("e = " + tm.e);
    }
}

输出结果:

完成
e = 6


下面给出了一个join和interrupt互动的例子,还是主线程要join子线程。 (视频下载) (全部书籍)

例:1.5.3_1-本章源码

class ThreadMark_to_win extends Thread {
    Thread mainT;
    int e;
    public void run() {
        for (int i = 0; i < 10; i++)
        {
            try {
                Thread.sleep(100);
            } catch (InterruptedException e1) {
                e1.printStackTrace();
            }
            if(i==4) mainT.interrupt();
            e = e + i;
        }
        System.out.println("完成"+"e 在子线程"+e);
    }
    public void setMainThread(Thread t1) {
        mainT=t1;
       
    }
}
public class Test {
    public static void main(String[] args) {
        Thread mainT = Thread.currentThread();
        ThreadMark_to_win tm = new ThreadMark_to_win();
        tm.setMainThread(mainT);
        tm.start();
        try {
            tm.join();
        } catch (InterruptedException e) {
            System.out.println("我是主程序, 也被打断");
        }
        System.out.println("主线程e = " + tm.e);
    }
}

输出结果:
我是主程序, 也被打断
主线程e = 10
完成e 在子线程45

后续:
马克-to-win:在上述的例子中:主线程还是想join子线程,但子线程当计算到i==4时,打断了主线程,所以主线程打出e=10;但子线程继续自己的线程运行,所以打印出“完成e 在子线程45”


下面这个例子和上面一样,除了说是子线程要join主线程。本例中还教会了大家,如何从主线程传参数到子线程。(视频下载) (全部书籍)

例:1.5.3_2-本章源码

class ThreadMark_to_win extends Thread {
    Thread mainT;
    Test t;
    public void run() {
        try {
            mainT.join();
        } catch (InterruptedException e) {
            System.out.println("我是子程序, 也被打断");
           
        }
        System.out.println("完成"+"e 在子线程"+t.e);
    }
    public void setMainThread(Thread t1, Test tTest) {
        mainT=t1;
        t=tTest;
    }
}
public class Test {
    int e;
    public static void main(String[] args) {
        Test t=new Test();
        Thread mainT = Thread.currentThread();
        ThreadMark_to_win tm = new ThreadMark_to_win();
        tm.setMainThread(mainT,t);
        tm.start();
        for (int i = 0; i < 10; i++)
        {
            try {
                Thread.sleep(100);
            } catch (InterruptedException e1) {
                e1.printStackTrace();
            }
            if(i==4) tm.interrupt();
            t.e = t.e + i;
        }
        System.out.println("主线程e = " + t.e);
    }
}
输出结果:
我是子程序, 也被打断
完成e 在子线程10
主线程e = 45

后续:
马克-to-win:注意本例中还教会了大家,如何从主线程传参数到子线程。

iiii)一个线程捕获另外一个线程的异常
马克-to-win:首先我们看子线程如何捕获子线程自己的异常,和以往一样。
例:1.5.4_a:

class ThreadMark_to_win extends Thread
{
  public void run()
  {
    for(int i=0;i<3;i++)
    { 
        try {
            Thread.sleep(100);
            throw new Exception("在子线程,我自己抛出的一个异常");
        } catch (InterruptedException e) {
            e.printStackTrace();
        }catch (Exception ee) {
            ee.printStackTrace();
        }
        System.out.println("在子线程"+i);
    }
  }

}
public class Test
{
  public static void main(String[] args)
  {
    ThreadMark_to_win tm = new ThreadMark_to_win();

    tm.start();
    for(int i=0;i<10;i++)
    { 
        try {
            Thread.sleep(100);
        } catch (InterruptedException e) {
            e.printStackTrace();
        }
        System.out.println("在主线程"+i);
      
    }
  }
}
结果:
在主线程0
java.lang.Exception: 在子线程,我自己抛出的一个异常
在子线程0
    at com.ThreadMark_to_win.run(Test.java:10)
在主线程1
java.lang.Exception: 在子线程,我自己抛出的一个异常
    at com.ThreadMark_to_win.run(Test.java:10)
在子线程1
在主线程2
在子线程2
java.lang.Exception: 在子线程,我自己抛出的一个异常
    at com.ThreadMark_to_win.run(Test.java:10)
在主线程3
在主线程4
在主线程5
在主线程6
在主线程7
在主线程8
在主线程9

下面我们首先看一下UncaughtExceptionHandler的用法。
马克-to-win:事 实上,UncaughtExceptionHandler可以不用放在一个线程中, 只要找到一个类放置就可以了或放置在它自己里面。(以下会给出一个例子), 但既然找到一个类放置就可以,我们就可以把他放在另一个线程(一个线程就是一个类)中,达到别的线程处理当前线程的异常的目的

例:1.5.4_0_3-本章源码

import java.lang.Thread.UncaughtExceptionHandler;
class ThreadMark_to_win  {
    Thread mainT;
    Test test;
    ThreadMark_to_win(Thread t1,Test t2)
    {
        mainT = t1;
        test=t2;
        mainT.setUncaughtExceptionHandler(new UncaughtExceptionHandler() {
            public void uncaughtException(Thread t, Throwable e) {
                System.out.println("在子程序处理呢, 传进来的参数是"+test.name+"   "
                        +t.getName()+"   "+ e.getMessage());
            }
        });       
    }
}
public class Test {
    String name="马克-to-win在主线程";
    public static void main(String[] args) {
        Thread mainT = Thread.currentThread();
        Test t=new Test();
        ThreadMark_to_win tm = new ThreadMark_to_win(mainT,t);
        for (int i = 0; i < 3; i++)
            System.out.println("在主线程" + i);
        throw new RuntimeException("在主线程,我自己抛出的一个异常");
    }
}

输出结果:

在主线程0
在主线程1
在主线程2
在子程序处理呢, 传进来的参数是马克-to-win在主线程   main   在主线程,我自己抛出的一个异常

例:1.5.4_0_4

import java.lang.Thread.UncaughtExceptionHandler;
public class Test {
    String name="马克-to-win在主线程";
    public static void main(String[] args) {
        Thread mainT = Thread.currentThread();
        Test t=new Test();
       // ThreadMark_to_win tm = new ThreadMark_to_win(mainT,t);
        mainT.setUncaughtExceptionHandler(new UncaughtExceptionHandler() {
            public void uncaughtException(Thread th, Throwable e) {
                System.out.println("在子程序处理呢, 传进来的参数是"+t.name+"   "
                        +th.getName()+"   "+ e.getMessage());
            }
        });
        for (int i = 0; i < 3; i++)
            System.out.println("在主线程" + i);
        throw new RuntimeException("在主线程,我自己抛出的一个异常");
    }
}

结果:

在主线程0
在主线程1
在主线程2
在子程序处理呢, 传进来的参数是马克-to-win在主线程   main   在主线程,我自己抛出的一个异常


马克-to-win:下面我们看主线程如何捕获子线程的异常  (视频下载) (全部书籍)

例:1.5.4-本章源码

import java.lang.Thread.UncaughtExceptionHandler;
class ThreadMark_to_win extends Thread
{
  public void run()
  {
    for(int i=0;i<3;i++)
    {  
        try {
            Thread.sleep(100);
        } catch (InterruptedException e) {
            e.printStackTrace();
        }
        System.out.println("在子线程"+i);
       
    }
    throw new RuntimeException("在子线程,我自己抛出的一个异常");
  }
  String getMyName()
  {
      return "马克-to-win在子线程";
  }
}
public class Test
{
  public static void main(String[] args)
  {
    ThreadMark_to_win tm = new ThreadMark_to_win();
    tm.setUncaughtExceptionHandler(new UncaughtExceptionHandler()
    {
      public void uncaughtException(Thread t, Throwable e)
      {
        System.out.println("在主程序处理呢  "+((ThreadMark_to_win)t).getMyName() + " : " + e.getMessage());
      }
    });
    tm.start();
    for(int i=0;i<10;i++)
    {  
        try {
            Thread.sleep(100);
        } catch (InterruptedException e) {
            e.printStackTrace();
        }
        System.out.println("在主线程"+i);
       
    }
  }
}
输出结果:
在主线程0
在子线程0
在主线程1
在子线程1
在子线程2
在主线程2
在主程序处理呢  马克-to-win在子线程 : 在子线程,我自己抛出的一个异常
在主线程3
在主线程4
在主线程5
在主线程6
在主线程7
在主线程8
在主线程9

后续:
马克-to-win:主线程通过tm.setUncaughtExceptionHandler这种方法,设置了一个Handler(所谓的处理器)这个处理器处理tm的uncaughtException(未捕获的异常)。


马克-to-win:接着我们看子线程如何捕获主线程的异常  (视频下载) (全部书籍)

例:1.5.4_2-本章源码

import java.lang.Thread.UncaughtExceptionHandler;
class ThreadMark_to_win extends Thread  {
    Thread mainT;
    Test test;
    ThreadMark_to_win(Thread t1,Test t2)
    {
        mainT = t1;
        test=t2;
        mainT.setUncaughtExceptionHandler(new UncaughtExceptionHandler() {
            public void uncaughtException(Thread t, Throwable e) {
                System.out.println("在子程序处理呢, 传进来的参数是"+test.name+"   "+t.getName()+"   "+ e.getMessage());
            }
        });       
    }
    public void run()
    {
        for(int i=0;i<3;i++)
        {  
            try {
                Thread.sleep(100);
            } catch (InterruptedException e) {
            }
            System.out.println("在子线程"+i);
        }
    }
}
public class Test {
    String name="马克-to-win在主线程";
    public static void main(String[] args) {
        Thread mainT = Thread.currentThread();
        Test t=new Test();
        ThreadMark_to_win tm = new ThreadMark_to_win(mainT,t);
        tm.start();
        for (int i = 0; i < 3; i++)
        {
            try {
                Thread.sleep(100);
            } catch (InterruptedException e) {
            }
            System.out.println("在主线程" + i);
        }
        throw new RuntimeException("在主线程,我自己抛出的一个异常");
    }
}

输出结果:
在主线程0
在子线程0
在主线程1
在子线程1
在主线程2
在子程序处理呢, 传进来的参数是马克-to-win在主线程   main   在主线程,我自己抛出的一个异常
在子线程2

后续:
马克-to-win:上面的程序通过new ThreadMark_to_win(mainT,t);把主线程的参考指针传进了子线程。事 实上,UncaughtExceptionHandler可以不用放在一个线程中, 只要找到一个类放置就可以了或放置在它自己里面。(以下会给出一个例子), 但既然找到一个类放置就可以,我们就可以把他放在另一个线程(一个线程就是一个类)中,达到别的线程处理当前线程的异常的目的

例:1.5.4_3-本章源码

import java.lang.Thread.UncaughtExceptionHandler;
class ThreadMark_to_win  {
    Thread mainT;
    Test test;
    ThreadMark_to_win(Thread t1,Test t2)
    {
        mainT = t1;
        test=t2;
        mainT.setUncaughtExceptionHandler(new UncaughtExceptionHandler() {
            public void uncaughtException(Thread t, Throwable e) {
                System.out.println("在子程序处理呢, 传进来的参数是"+test.name+"   "
                        +t.getName()+"   "+ e.getMessage());
            }
        });       
    }
}
public class Test {
    String name="马克-to-win在主线程";
    public static void main(String[] args) {
        Thread mainT = Thread.currentThread();
        Test t=new Test();
        ThreadMark_to_win tm = new ThreadMark_to_win(mainT,t);
        for (int i = 0; i < 3; i++)
            System.out.println("在主线程" + i);
        throw new RuntimeException("在主线程,我自己抛出的一个异常");
    }
}

输出结果:

在主线程0
在主线程1
在主线程2
在子程序处理呢, 传进来的参数是马克-to-win在主线程   main   在主线程,我自己抛出的一个异常

例:1.5.4_4

import java.lang.Thread.UncaughtExceptionHandler;
public class Test {
    String name="马克-to-win在主线程";
    public static void main(String[] args) {
        Thread mainT = Thread.currentThread();
        Test t=new Test();
       // ThreadMark_to_win tm = new ThreadMark_to_win(mainT,t);
        mainT.setUncaughtExceptionHandler(new UncaughtExceptionHandler() {
            public void uncaughtException(Thread th, Throwable e) {
                System.out.println("在子程序处理呢, 传进来的参数是"+t.name+"   "
                        +th.getName()+"   "+ e.getMessage());
            }
        });
        for (int i = 0; i < 3; i++)
            System.out.println("在主线程" + i);
        throw new RuntimeException("在主线程,我自己抛出的一个异常");
    }
}

结果:

在主线程0
在主线程1
在主线程2
在子程序处理呢, 传进来的参数是马克-to-win在主线程   main   在主线程,我自己抛出的一个异常

iiiii)Yield的用法
马克-to-win:yield英文是屈服投降的意思。 (视频下载) (全部书籍)当前线程投降就是当前线程希望释放CPU的自己的占用权,( 但系统可以忽略它这个请求。)参见: https://docs.oracle.com/javase/7/docs/api/java/lang/Thread.html#yield%28%29 其中有这么句话: A hint to the scheduler that the current thread is willing to yield its current use of a processor. The scheduler is free to ignore this hint.这样的话当前线程yield时,有时虽然它自己想让别的线程执行,但系统出于优化考虑,可能还是会让当前的线程继续执行。这样的话,yield就会有一种不可控的效果,所以并行编程的最佳实践建议少用yield。

例:1.5.5-本章源码

class ThreadMark_to_win extends Thread {
    private String s;
    public ThreadMark_to_win(String s) {
        this.s = s;
    }
    public void run() {
        for (int i = 0; i < 10; i++) {
            try {
                Thread.sleep(100);
            } catch (InterruptedException e) {
            }
            System.out.println(s);
/*当前线程希望释放CPU的自己的占用权,( 但系统可以忽略。) */           
            Thread.yield();
        }
    }
}

public class Test {
    public static void main(String[] args) {
        Thread t1 = new ThreadMark_to_win("线程1");
        Thread t2 = new ThreadMark_to_win("线程2");
        t1.start();
        t2.start();
    }
}

运行结果:
线程1
线程2
线程2
线程1
线程1
线程2
线程2
线程1
线程2
线程1
线程1
线程2
线程2
线程1
线程1
线程2
线程2
线程1
线程2
线程1

后续:
马克-to-win:根据结果可以看出:结果并不是1,2之间稳定交替,而是不可控的状态。


6.线程优先级 (视频下载) (全部书籍)

java中线程的优先级用1-10之间的数字表示,数值越大优先级越高,默认的优先级为5。Java中的线程优先级是在Thread类中定义的常量 NORM_PRIORITY : 值为5,MAX_PRIORITY :值为10,MIN_PRIORITY : 值为1,缺省优先级为 NORM_PRIORITY。有关优先级的常用方法有两个:1)final void setPriority(int newp) : 修改线程的当前优先级  2)final int getPriority() : 返回线程的优先级。马克-to-win:线程的优先级不能担保线程的执行次序。优先级高的线程获取CPU执行的几率较大,优先级低的线程也有机会执行。参考http://www.javamex.com/tutorials/threads/priority_what.shtml其中有句:there'd quite possibly be lower-priority threads that barely got any CPU at all, being continually starved by higher-priority threads that needed CPU. So Windows has a fallback mechanism, whereby a thread that hasn't run for a long time is given a temporary priority boost.大致意思:为防止低优先级的线程被饿死,Windows有个抗争的方法, 给低优先级的线程一个优先级的临时提升。。。。。。更多的请大家参考此网站。

例:1.6.1-本章源码

class ThreadMark_to_win extends Thread {
    static boolean go=true;
    private String s;
    int i;
    public ThreadMark_to_win(String s) {
        this.s = s;
    }
    public void run() {
        while(go){
            System.out.println(s+" 到了  "+i++);
            try {
                this.sleep(1);
            } catch (InterruptedException ex) {
                ex.printStackTrace();
            }
        }
    }
}

public class Test {
    public static void main(String[] args) {
        Thread t1 = new ThreadMark_to_win("线程1");
        Thread t2 = new ThreadMark_to_win("线程2");
        t1.setPriority(1);
        t2.setPriority(10);
        t1.start();
        t2.start();
        try {
            Thread.sleep(30000);
        } catch (InterruptedException e) {
            e.printStackTrace();
        }
        ThreadMark_to_win.go=false;
       
    }
}

输出结果:

线程1 到了  0
线程2 到了  0
线程1 到了  1
线程2 到了  1
线程2 到了  2
线程1 到了  2
线程2 到了  3
线程1 到了  3
线程2 到了  4
线程1 到了  4
线程2 到了  5
线程1 到了  5
线程2 到了  6
线程1 到了  6


线程1 到了  3335
线程2 到了  4753
线程2 到了  4754
线程2 到了  4755
线程2 到了  4756
线程1 到了  3336
线程2 到了  4757
线程2 到了  4758
线程2 到了  4759


后续:马克-to-win:上述程序中,boolean go=true; 被设置成静态变量, 这样, 它就可以被多个类或者说线程共享了,主线程睡了30秒以后,一下同时停止了两个线程。可以看出2 比1,多跑了1000 多个数, 但开始时并不明显,路遥知马力!


7.精灵线程(Daemon)或守护线程: (视频下载) (全部书籍)

马克-to-win:Daemon英文意思是希腊神话中半人半神的精灵,守护神。在java中,"精灵守护Daemon线程"就是运行在程序后台的线程,一般被用于在后台为其它线程提供服务。既然它在后台运行,当前台线程(前几节学习的线程)运行完,主体程序就结束了,理所当然该后台线程也应该随之结束了。相对来讲,前面几节我们讲的线程是"用户线程",这两种线程技术上来讲有什么分别呢?java官方文档中大致这样描述:The Java Virtual Machine continues to execute threads until All threads that are not daemon threads have died。 这句话的含义就是:用户线程不完,jvm系统就不完,要是想只运行"精灵Daemon线程",对不起jvm不给面子,不伺候,就关闭了,不给"精灵Daemon线程"们单独运行的机会。这句话比较难理解,我换一句话来说这件事。当一个应用程序的所有非精灵线程停止运行时,即使仍有精灵线程还在运行,该应用程序也将终止,反过来,只要还有非精灵线程在运行,应用程序就不会停止。我们可以通过setDaemon(boolean on)来设置某线程为精灵线程。用isDaemon()来判断某线程是否为精灵线程或守护线程。注意:要想设置一个线程为精灵守护线程,setDaemon必须在start前调用。

例:1.7.1_1-本章源码

class ThreadMark_to_win extends Thread {
    public void run(){
        for(int i = 1; i <= 15;i++){
            try{
                Thread.sleep(100);  
            } catch (InterruptedException ex){
                ex.printStackTrace();
            }
            System.out.println("子线程 "+i);
        }
    }
}
public class Test extends Thread{
    public static void main(String [] args){
       ThreadMark_to_win tm = new ThreadMark_to_win();
       tm.setDaemon(true);
       tm.start();
       System.out.println("子线程是精灵线程吗?" +tm.isDaemon());
       try{
           Thread.sleep(1000);
       } catch (InterruptedException ex){
           ex.printStackTrace();
       }
       System.out.println(Thread.currentThread().getName()+"已经结束");
   }

输出结果:

子线程是精灵线程吗?true
子线程 1
子线程 2
子线程 3
子线程 4
子线程 5
子线程 6
子线程 7
子线程 8
子线程 9
main已经结束
子线程 10

后续:马克-to-win:注意上面主线程一结束,精灵线程立刻玩儿完。相对来讲,我们看一个非精灵线程的对等例子。


例:1.7.1_2-本章源码

class ThreadMark_to_win extends Thread {
    public void run(){
        for(int i = 1; i <= 15;i++){
            try{
                Thread.sleep(100);  
            } catch (InterruptedException ex){
                ex.printStackTrace();
            }
            System.out.println("子线程 "+i);
        }
    }
}
public class Test extends Thread{
    public static void main(String [] args){
       ThreadMark_to_win tm = new ThreadMark_to_win();
//       tm.setDaemon(true);
       tm.start();
       System.out.println("子线程是精灵线程吗?" +tm.isDaemon());
       try{
           Thread.sleep(1000);
       } catch (InterruptedException ex){
           ex.printStackTrace();
       }
       System.out.println(Thread.currentThread().getName()+"已经结束");
   }

输出结果:
子线程是精灵线程吗?false
子线程 1
子线程 2
子线程 3
子线程 4
子线程 5
子线程 6
子线程 7
子线程 8
子线程 9
main已经结束
子线程 10
子线程 11
子线程 12
子线程 13
子线程 14
子线程 15


8.线程安全

什么是线程安全? 马克-to-win: (视频下载) (全部书籍)最大的大白话,你的代码一个线程执行挺好,一上多线程测试就玩儿完(结果不是你所想要的),这就是线程不安全。反之为线程安全。首先,我们把第二章讲单态模式或单例模式(Singleton)的例子再搬过来一次,但这里把一些无关的打印和注释去掉了:
 
例:1.8.1-本章源码

class Photoshop {
    private Photoshop() {
    }
    private static Photoshop photoshop = null;// 这个值独立于任何对象存在,实例化任何对象之前,这个成员就有可能有值。
    public static Photoshop getInstanceQixy() {
        if (photoshop == null) {
            photoshop = new Photoshop();
        }
        return photoshop;
    }
}
public class Test {
    public static void main(String[] args) {
        Photoshop photoshopI1 = Photoshop.getInstanceQixy();
        Photoshop photoshopI2 = Photoshop.getInstanceQixy();
        System.out.println(photoshopI1+"  "+photoshopI2);
    }
}

输出结果:
Photoshop@1b67f74  Photoshop@1b67f74

后序:上面的例子一切都正常,就是一个非常普通的单态模式的实现。但要想上面的例子正确运行,我们必须确保运行环境是单线程的。如果运行环境是多线程的,以上的单态模式的实现,就有一定的机率,运行得不到正确的结果了。以下我用实验(下面的例子)来说明我这一论点。

例:1.8.1_b-本章源码

class Photoshop {
    private Photoshop() {
    }
    private static Photoshop photoshop = null;
    public static Photoshop getInstanceQixy() {
        if (photoshop == null) {
            photoshop = new Photoshop();
        }
        return photoshop;
    }
}
class MyThreadMark_to_win extends Thread {
    public void run() {
        Photoshop photoshopI1 = Photoshop.getInstanceQixy();
        System.out.println(Thread.currentThread().getName() + "实例是 "
                + photoshopI1);
    }
}
public class Test {
    public static void main(String[] args) {
        MyThreadMark_to_win mt1 = new MyThreadMark_to_win();
        MyThreadMark_to_win mt2 = new MyThreadMark_to_win();
        mt1.start();
        mt2.start();
    }
}

输出结果有时是(占少数):
Thread-1实例是 Photoshop@1270b73
Thread-0实例是 Photoshop@89ae9e


而输出结果多数是:(占多数)
Thread-0实例是 Photoshop@a62fc3
Thread-1实例是 Photoshop@a62fc3


后序:因为两个线程同时启动,如果一个线程执行完photoshop = new Photoshop();以后,另外一个线程执行if (photoshop == null)判断,则只会得到一个photoshop实例。然而对于得到了两个photoshop实例结果的这种情况,一定是这两个线程同时执行if (photoshop == null)这句指令造成的。而线程的执行顺序和速度是我们人为不可控的。这就是程序得到以上两种结果的原因。既然你的目的是编一个单例的程序,单线程时结果正确,而在多线程执行环境时,结果得到了两个实例,(结果非预期),这种情况就说,我们编的代码Photoshop类是线程不安全的。马克-to-win:如果你确定你的代码不会在多线程的环境下执行,线程不安全的代码也没关系,因为通常情况下解决线程不安全要用synchronized,会影响性能。如果你确定你的代码不会。。。。。更多内容,进入: 


下面我们再给出一个线程不安全的例子。 (视频下载) (全部书籍)

例:1.8.2-本章源码

class BookMark_to_win {
    int bookNum=10;
    void onlySellOne() {
        if (bookNum > 0) {
            System.out.println(Thread.currentThread().getName()
                    + " before" + bookNum);
            bookNum--;
            try {
                Thread.sleep(1000);
            } catch (Exception e) {
            }
            System.out.println(Thread.currentThread().getName()
                    + " after " + bookNum);
        }
    }
}
public class Test {
    public static void main(String[] args) {
        BookMark_to_win bookM = new BookMark_to_win();
        while (bookM.bookNum>0) {
            bookM.onlySellOne();
        }
    }
}

输出结果:

main before10
main after 9
main before9
main after 8
main before8
main after 7
main before7
main after 6
main before6
main after 5
main before5
main after 4
main before4
main after 3
main before3
main after 2
main before2
main after 1
main before1
main after 0

后续:在以上的例子中,我们编了一个方法叫onlySellOne。这个方法的目的就是每一次只卖一本书。单线程的环境下,我们看到结果符合我们的预期。下面我们就把它放在一个多线程的环境下测试。

马克-to-win:下面的例子是比较明显的,本来说好了,if (bookNum > 0)的话,我才买书,因为没有书,卖什么?而现在却把书卖出了负数,这已经明显不符合逻辑了。要是银行账号的话,你的账号就能成为负值,意味着你花了银行 的钱。只要方法中有关键变量又有判断还要改变此变量,线程安全的错误就会比较邪乎!(比如单态中也有判断)没判断,虽然也错,不那么邪乎!

例:1.8.2_b-本章源码

class BookMark_to_win {
    int bookNum=1;
    void onlySellOne() {
        if (bookNum > 0) {
            System.out.println(Thread.currentThread().getName()
                    + " before" + bookNum);
            bookNum--;
            try {
                Thread.sleep(1000);
            } catch (Exception e) {
            }
            System.out.println(Thread.currentThread().getName()
                    + " after " + bookNum);
        }
    }
}
class MyThread extends Thread {
    BookMark_to_win book;
    MyThread(BookMark_to_win tmp) {
        this.book = tmp;
    }
    public void run() {    
        while (book.bookNum>0) {
            book.onlySellOne();
        }
    }
}
public class Test {
    public static void main(String[] args) {
        BookMark_to_win bookM = new BookMark_to_win();
        Thread t1 = new MyThread(bookM);
        Thread t2 = new MyThread(bookM);
        t1.start();
        t2.start();
    }
}

输出结果:

Thread-0 before1
Thread-1 before1
Thread-1 after -1
Thread-0 after -1

后续:我们仔细观察会发现:Thread-0 before1          Thread-0 after -1, 线程0之前读出有1本书,调用了onlySellOne后,里面只做了一次"bookNum--"操作,发现结果是“Thread-0 after -1”即为还剩-1本书。为什么1-1=-1呢?原来线程0调用onlySellOne的"bookNum--";时,线程1正好也执行到这, 调用了"bookNum--"; 所以实际上是1-1-1=-1;既然我们预期"bookNum--"是每次只卖一本书,单线程环境执行挺好,而在多线程环境下,得到了一次减两本的结果,典型属于线程不安全。

当我们仔细研究会发现,当几个线程访问共同的变量, (视频下载) (全部书籍)如果此变量可被改,由于线程的执行顺序和速度由jvm的优化决定,我们不可控,所以结果也是不确定,就造成了线程的不安全。马克-to-win:如何解决线程不安全的问题呢?答案:1)如果几个线程必须要改某个共同的变量,我们就加synchronized, 下节我们就讲。或加锁。二者道理一样 

9.线程同步(synchronized)

马克-to-win:从上节我们学到,(视频下载) (全部书籍)当多个线程访问且更改同一个变量 时,很容易出现线程安全问题,诚然,我们可以通过一些其他手段,比如局部变量,多个实例,调整程序结构来解决线程安全问题,但是通常来讲,通过同步机制 synchronized来解决线程安全问题更加确定。比如,由于需求等其他限制条件决定,我们不能够用局部变量或多个实例或什么其他办法解决怎么办? synchronized为我们提供了比较确定的方法。换句话说,线程安全问题, synchronized基本能解决。分析上一节的线程安全问题,我们发现问题的起因主要是两个线程同时访问更改共同的变量造成的,只要我们让能够更改共 同变量的方法序列的执行,(换句话就是一个执行完后,另一个再执行,) 就没问题了。如何实现呢? 用synchronized, 现在针对上一节有问题的例子:1.8.1_b,我们只加一个字synchronized, 问题就解决了,

例1.9.1-本章源码

class Photoshop {
    private Photoshop() {
    }
    private static Photoshop photoshop = null;
    public synchronized static Photoshop getInstanceQixy() {
        if (photoshop == null) {
            photoshop = new Photoshop();
        }
        return photoshop;
    }
}
class MyThreadMark_to_win extends Thread {
    public void run() {
        Photoshop photoshopI1 = Photoshop.getInstanceQixy();
        System.out.println(Thread.currentThread().getName() + "实例是 "
                + photoshopI1);
    }
}
public class Test {
    public static void main(String[] args) {
        MyThreadMark_to_win mt1 = new MyThreadMark_to_win();
        MyThreadMark_to_win mt2 = new MyThreadMark_to_win();
        mt1.start();
        mt2.start();
    }
}

输出结果:

Thread-1实例是 Photoshop@a62fc3
Thread-0实例是 Photoshop@a62fc3


现在针对上一节有问题的例子:1.8.2_b,我们只加一个字synchronized, 问题也能解决,我们看一下。


例1.9.2-本章源码

class BookMark_to_win {
    int bookNum=10;
    synchronized void onlySellOne() {
        if (bookNum > 0) {
            System.out.println(Thread.currentThread().getName()
                    + " before" + bookNum);
            bookNum--;
            try {
                Thread.sleep(1000);
            } catch (Exception e) {
            }
            System.out.println(Thread.currentThread().getName()
                    + " after " + bookNum);
        }
    }
}
class MyThread extends Thread {
    BookMark_to_win book;
    MyThread(BookMark_to_win tmp) {
        this.book = tmp;
    }
    public void run() {
/*run()里不能就只是写book.onlySellOne(), 因为会呈现
两个线程在那交替的效果*/       
        while (book.bookNum>0) {
            book.onlySellOne();
        }
    }
}
public class Test {
    public static void main(String[] args) {
        BookMark_to_win bookM = new BookMark_to_win();
        Thread t1 = new MyThread(bookM);
        Thread t2 = new MyThread(bookM);
        t1.start();
        t2.start();
    }
}

输出结果:

Thread-0 before10
Thread-0 after 9
Thread-0 before9
Thread-0 after 8
Thread-0 before8
Thread-0 after 7
Thread-0 before7
Thread-0 after 6
Thread-1 before6
Thread-1 after 5
Thread-1 before5
Thread-1 after 4
Thread-0 before4
Thread-0 after 3
Thread-0 before3
Thread-0 after 2
Thread-0 before2
Thread-0 after 1
Thread-0 before1
Thread-0 after 0

if (bookNum > 0) {直接执行完了,就可以退出synchronized块儿了,要想不切换,就if变成while,就一个线程知道执行完为止。),完美配合,从10到0,一个一个的递减。perfect!

线程同步Synchronized,监视器monitor和锁lock的关系 (视频下载) (全部书籍)

既然有关监视器monitor的概念比较难,大家怎么解释的都有。首先我给出一下java的官方文档,也是最权威的解释:

Synchronization is built around an internal entity known as the intrinsic lock or monitor lock. (The API specification often refers to this entity simply as a "monitor."),Every object has an intrinsic lock associated with it. By convention, a thread that needs exclusive and consistent access to an object's fields has to acquire the object's intrinsic lock before accessing them, and then release the intrinsic lock when it's done with them.

源自:http://docs.oracle.com/javase/tutorial/essential/concurrency/locksync.html

根据官方文档,我来说说我的看法。马克-to-win: synchronized 工作机制是这样的:Java中每个对象都有一把锁与之相关联,锁控制着对象的synchronized代码。一个要执行对象的synchronized代 码的线程必须先获得那个对象的锁。(即使两个方法分别被冠以synchronized,见例子例1.9.3-b)有点儿监控(monitor)的感觉吗?

synchronized关键字使用方式有两种:synchronized方法和synchronized块。以下会给出例子:

例1.9.3-本章源码

class A {
    public synchronized void f1() {
        for (int i = 0; i < 3; i++) {
            try {
                Thread.sleep(1000);
            } catch (Exception e) {
            }
            System.out.println("i = " + i);
        }
    }
}

class MyThread extends Thread {
    A a;

    public MyThread(A a) {
        this.a = a;
    }
    public void run() {
        a.f1();
    }
}

public class TestMark_to_win {
    public static void main(String[] args) {
        A a = new A();
        Thread t1 = new MyThread(a);
        Thread t2 = new MyThread(a);
        t1.start();
        t2.start();
    }
}

运行结果是

i = 0
i = 1
i = 2
i = 0
i = 1
i = 2

假如你去掉了关键字"synchronized"

结果就变成了
i = 0
i = 0
i = 1
i = 1
i = 2
i = 2

为什么?当有“synchronized”的关键字,两个线程必须序列化执行。否则,他们将并发执行。


以下两个例子说明synchronized块的用法: (视频下载) (全部书籍)

例1.9.4_a-本章源码

class A {
    public void disp() {
        System.out.println("新线程马克-to-win启动:");
        for (int i = 0; i < 10; i++) {
            System.out.println(i);
            try {
                Thread.sleep(500);
            } catch (Exception e) {
            }
        }
    }
}

public class TestMark_to_win extends Thread {
    A a;

    public TestMark_to_win(A a) {
        this.a = a;
    }

    public void run() {
        a.disp();
    }

    public static void main(String[] args) {
        A a = new A();
        TestMark_to_win t1 = new TestMark_to_win(a);
        TestMark_to_win t2 = new TestMark_to_win(a);
        t1.start();
        t2.start();
    }
}


运行结果是:

新线程启动:
新线程启动:
0
0
1
1
2
2
3
3
4
4
5
5
6
6
7
7
8
8
9
9


例1.9.4_b-本章源码


class A {
    public void disp() {
        synchronized (this) {
            System.out.println("新线程马克-to-win启动:");
            for (int i = 0; i < 10; i++) {
                System.out.println(i);
                try {
                    Thread.sleep(500);
                } catch (Exception e) {
                }
            }
        }
    }
}

public class TestMark_to_win extends Thread {
    A a;

    public TestMark_to_win(A a) {
        this.a = a;
    }

    public void run() {
        a.disp();
    }

    public static void main(String[] args) {
        A a = new A();
        TestMark_to_win t1 = new TestMark_to_win(a);
        TestMark_to_win t2 = new TestMark_to_win(a);
        t1.start();
        t2.start();
    }
}

运行结果是

新线程启动:
0
1
2
3
4
5
6
7
8
9
新线程启动:
0
1
2
3
4
5
6
7
8
9


之后本节有关synchronized的内容(特别是有关ReentrantLock的部分),初学者可以略过。直接跳到学死锁。


类中多个Synchronized方法  (视频下载) (全部书籍)

下面给出一个例子,说明一个class中有两个方法synchronized的情况。它们互相阻挡的用法和上面的“一个方法有synchronized”的情况是一样的。

例1.9.5:

class A {
    public synchronized void f1() {
        for (int i = 0; i < 3; i++) {
            try {
                Thread.sleep(1000);
            } catch (Exception e) {
            }
            System.out.println("f1 i = " + i);
        }
    }
   
    public synchronized void f2() {
        for (int i = 0; i < 3; i++) {
            try {
                Thread.sleep(1000);
            } catch (Exception e) {
            }
            System.out.println("f2 i = " + i);
        }
    }
}

class MyThread1 extends Thread {
    A a;
    public MyThread1(A a) {
        this.a = a;
    }
    public void run() {
        a.f1();
    }
}

class MyThread2 extends Thread {
    A a;
    public MyThread2(A a) {
        this.a = a;
    }
    public void run() {
        a.f2();
    }
}
public class TestMark_to_win {
    public static void main(String[] args) {
        A a = new A();
        Thread t1 = new MyThread1(a);
        Thread t2 = new MyThread2(a);
        t1.start();
        t2.start();
    }
}


输出结果:

f1 i = 0
f1 i = 1
f1 i = 2
f2 i = 0
f2 i = 1
f2 i = 2


上面两个synchronized的方法如其中一个无限循环,一定会挡住其他的方法。下面的例子先进f1的线程死死挡住想进f2的线程。

例1.9.5_b:

class A {
    public synchronized void f1() {
        //快速无限循环,别的线程什么也做不了
            while (true) {
            }
    }
   
    public synchronized void f2() {
        for (int i = 0; i < 3; i++) {
            try {
                Thread.sleep(1000);
            } catch (Exception e) {
            }
            System.out.println("f2 i = " + i);
        }
    }
}

class MyThread1 extends Thread {
    A a;
    public MyThread1(A a) {
        this.a = a;
    }
    public void run() {
        a.f1();
    }
}

class MyThread2 extends Thread {
    A a;
    public MyThread2(A a) {
        this.a = a;
    }
    public void run() {
        a.f2();
    }
}
public class TestMark_to_win {
    public static void main(String[] args) {
        A a = new A();
        Thread t1 = new MyThread1(a);
        Thread t2 = new MyThread2(a);
        t1.start();
        try {
            Thread.sleep(1000);
        } catch (Exception e) {
        }      

        t2.start();
    }
}

结果什么也输不出来


如果我们想达到这个目的:想用f1的线程互相挡住,而想用f1和f2的不同线程之间互相不挡,我们得用不同的锁。

例1.9.5_c:

class A {
    private Object lock1 = new Object();
    private Object lock2 = new Object();
    public void f1() {
        synchronized (lock1) {
            while (true) {
                try {
                    Thread.sleep(1000);
                } catch (InterruptedException e) {
                    e.printStackTrace();
                }
                System.out.println(Thread.currentThread().getName()+"正在无限耗用你的CPU,eclipse的红灯还在亮");
            }
        }
    }

    public void f2() {
        synchronized (lock2) {
            for (int i = 0; i < 3; i++) {
                try {
                    Thread.sleep(1000);
                } catch (Exception e) {
                }
                System.out.println("f2 i = " + i
                        + Thread.currentThread().getName());
            }
        }
    }
}

class MyThread1 extends Thread {
    A a;
    public MyThread1(A a) {
        this.a = a;
    }
    public void run() {
        a.f1();
    }
}

class MyThread2 extends Thread {
    A a;
    public MyThread2(A a) {
        this.a = a;
    }
    public void run() {
        a.f2();
    }
}

public class Test {
    public static void main(String[] args) {
        A a = new A();
        Thread t1 = new MyThread1(a);
        Thread t11 = new MyThread1(a);
        Thread t2 = new MyThread2(a);
        t1.start();
        t11.start();
        t2.start();
    }
}


输出结果:

Thread-1正在无限耗用你的CPU,eclipse的红灯还在亮
f2 i = 0Thread-2
Thread-1正在无限耗用你的CPU,eclipse的红灯还在亮
f2 i = 1Thread-2
Thread-1正在无限耗用你的CPU,eclipse的红灯还在亮
f2 i = 2Thread-2
Thread-1正在无限耗用你的CPU,eclipse的红灯还在亮


Synchronized引起的并发线程的无限等待的解决方法  (视频下载) (全部书籍)

我们在数据库并发访问中经常用到:select * from table for update,这句话会引起所有执行这句话的线程排队,一个一个的序列执行。等待的线程只能死等,直到超时为止。下面程序的f1就模仿这句话的感觉。

例1.9.6:

class A {
    public synchronized void f1() {
            try {
                Thread.sleep(5000);
            } catch (InterruptedException e) {
                e.printStackTrace();
            }
            System.out.println("f1模仿select * from table for update,执行的很慢"+Thread.currentThread().getName());
    }
}

class MyThread1 extends Thread {
    A a;
    public MyThread1(A a) {
        this.a = a;
    }
    public void run() {
        a.f1();
    }
}


public class TestMark_to_win {
    public static void main(String[] args) {
        MyThread1[] threads = new MyThread1[3];
        A a = new A();
        for (int i = 0; i < 3; i++) {
            threads[i] = new MyThread1(a);
            threads[i].start();
        }
    }
}


输出结果:

f1模仿select * from table for update,执行的很慢Thread-0
f1模仿select * from table for update,执行的很慢Thread-2
f1模仿select * from table for update,执行的很慢Thread-1


下面程序的concuNum会记录,现在队列里多少人在排队。selectForUpdateIntel就成了智能版的select * from table for update,人少我就排队,人多我就直接撤。

例1.9.6:

class A {
    int concuNum=0;
    private synchronized void selectForUpdateSyn() {
        try {
            Thread.sleep(5000);
        } catch (InterruptedException e) {
            e.printStackTrace();
        }
        System.out.println("模仿select * from table for update,执行的很慢"
                + Thread.currentThread().getName()+"目前队中有"+concuNum+"人");
    }
   
    public void selectForUpdate() {
        concuNum++;
        selectForUpdateSyn();
        concuNum--;
    }
    public void selectForUpdateIntel() {
        if(concuNum<3){
            System.out.println("我是聪明人,目前队中人不多,有"+concuNum+"人,我等");
            selectForUpdate();
        }else {
            System.out.println(concuNum+"! 我是聪明人,排队人太多,我先不排了");
        }
    }
}

class MyThread1 extends Thread {
    A a;

    public MyThread1(A a) {
        this.a = a;
    }

    public void run() {
        a.selectForUpdate();
    }
}


class MyThread2 extends Thread {
    A a;
    public MyThread2(A a) {
        this.a = a;
    }
    public void run() {
        a.selectForUpdateIntel();
    }
}

public class TestMark_to_win {
    public static void main(String[] args) {
        MyThread1[] threads = new MyThread1[3];
        A a = new A();
        for (int i = 0; i < 3; i++) {
            threads[i] = new MyThread1(a);
        }
        MyThread2 myThread2=new MyThread2(a);

        threads[0].start();
        threads[1].start();
        myThread2.start();
        threads[2].start();
    }
}

运行结果:

3! 我是聪明人,排队人太多,我先不排了
模仿select * from table for update,执行的很慢Thread-0目前队中有3人
模仿select * from table for update,执行的很慢Thread-1目前队中有2人
模仿select * from table for update,执行的很慢Thread-2目前队中有1人

运行结果有时又变成:

我是聪明人,目前队中人不多,有1人,我等
模仿select * from table for update,执行的很慢Thread-1目前队中有4人
模仿select * from table for update,执行的很慢Thread-2目前队中有3人
模仿select * from table for update,执行的很慢Thread-0目前队中有2人
模仿select * from table for update,执行的很慢Thread-3目前队中有1人


ReentrantLock彻底解决并发线程的无限等待 (视频下载) (全部书籍)

马 克-to-win:上面的例子,只能做到根据请求Synchronized方法的队列里的线程的数量,决定我是否进入队列等待。但是一旦决定了等待,进入 了等待队列以后,就无法退出队列。想达到这个效果,必须要用到ReentrantLock的技术。ReentrantLock翻译成中文就是可重入锁。下面这段话比较难,新手可忽略。和可重入锁相对的就是不可重入锁,又名自旋锁。为什么叫不可重入锁?因为一旦进入一个带锁的方法,你在这个方法当中,如果想再进入另外一个带锁的方法,就进不去了,好像自己给自己上了锁(自旋)因为你在第一个方法当中你还没有解开锁。而可重入锁在判断中加了一条是不是本个线程?如是,就随便进入当前对象所有带锁的方法。如果对我以上这段话,老手也是不理解的话,可参考我参考目录中的一个参考网页。注意sun公司的ReentrantLock是个类,而sun公司的Lock是个接口。所以为求简单,我们的例子中就用ReentrantLock,ReentrantLock就是为了解决 Synchronized技术的很多弊病而生的。缺点就是使用复杂,简单问题还用 Synchronized就挺好。马克-to-win:因为ReentrantLock类中的lockInterruptibly();方法能够让正在想 获得锁的线程被其他线程中断(见下例),从而打消原来要获得锁的计划。当然如果没有其他的线程占有锁的话,lockInterruptibly();方法也可以让当 前线程从容获得锁。

另外底下的例子有点需要注意,lock.lockInterruptibly();的方法的catch部分要放在上一级的方法调用 中。马克-to-win:换句话说,就故意让它在被打断时在本级方法中崩溃,回到上一级。否则的话,如果本级方法能够优雅的执行完,执行到 lock.unlock();就会出现问题。(Exception in thread java.lang.IllegalMonitorStateException,报完这个exception后,会在lock.unlock()这句话直接崩溃不能优雅结束)因为锁已经被打断怎么还能unlock呢?另外注意正常的锁的lock.unlock别忘了必须执行。否则程 序的锁的状态 (lock hold count)就错了。lockInterruptibly():Acquires the lock if it is not held by another thread and returns immediately, setting the lock hold count to one. If the current thread already holds this lock then the hold count is incremented by one and the method returns immediately.  

例1.9.7:(本例模仿七个人想排队,但后来两个人主动放弃排队,自己打断自己。)

import java.util.concurrent.locks.ReentrantLock;
class A {
    private ReentrantLock lock = new ReentrantLock();
    int ticketNum = 10;
    public void buyOne() throws InterruptedException {
        System.out.println("just before lock.lockInterruptibly();");
/*lock.lockInterruptibly();的意思就是,当前线程获取了一把可打断的锁。当有n个thread同时执行到这句时,只有第一个thread能获得这个lock,其他thread都必须挡在那,在后边排队。catch不能放在本级方法调用中,否则当lock被打断后,继续优雅执行,lock.unlock();被执行时,就会出现lock状态不对的问题(Exception in thread  java.lang.IllegalMonitorStateException,报完这个exception后,会在lock.unlock()这句话直接崩溃不能优雅结束),因为lock已经被打断了。换句话说,lock一旦被打断,必须确保lock.unlock()不能被执行。*/
        lock.lockInterruptibly();
        System.out.println(Thread.currentThread().getName() + "ticketNum is"
                + ticketNum);
        if (ticketNum > 0) {
            ticketNum--;
            try {
                Thread.sleep(5000);
            } catch (InterruptedException e) {
                e.printStackTrace();
            }
            System.out.println("模仿select * from table for update,执行的很慢,买了一张"
                    + Thread.currentThread().getName() + "ticketNum is"
                    + ticketNum);
        }
        lock.unlock();//释放锁
    }

    public void buyBatch(int num) throws InterruptedException {
        System.out.println("just before lock.lockInterruptibly();");
        lock.lockInterruptibly();
        System.out.println("Thread.currentThread().getName()+ticketNum is"
                + ticketNum);
        if (ticketNum >= num) {
            ticketNum = ticketNum - num;
            try {
                Thread.sleep(5000);
            } catch (InterruptedException e) {
                e.printStackTrace();
            }
            System.out.println("模仿select * from table for update,执行的很慢,买了几张"
                    + Thread.currentThread().getName() + "ticketNum is"
                    + ticketNum);
        }
        lock.unlock();
    }
}

class MyThread1 extends Thread {
    A a;
    public MyThread1(A a) {
        this.a = a;
    }
    public void run() {
        try {
            a.buyOne();
        } catch (InterruptedException e) {
            System.out.println(Thread.currentThread().getName() + "取消一张");
            System.out.println(e);
        }
    }
}

class MyThread2 extends Thread {
    A a;
    public MyThread2(A a) {
        this.a = a;
    }
    public void run() {
        try {
            a.buyBatch(3);
        } catch (InterruptedException e) {
            System.out.println(Thread.currentThread().getName() + "取消几张");
            System.out.println(e);
        }
    }
}

public class TestMark_to_win {
    public static void main(String[] args) throws InterruptedException {
        MyThread1[] threads = new MyThread1[6];
        A a = new A();
        for (int i = 0; i < 6; i++) {
            threads[i] = new MyThread1(a);
        }

MyThread2 myThread2 = new MyThread2(a);

        threads[0].start();
        threads[1].start();
        threads[2].start();
        threads[3].start();
        threads[4].start();
        myThread2.start();
        threads[5].start();
        try {
            Thread.sleep(1000);
        } catch (InterruptedException e) {
            e.printStackTrace();
        }
        threads[4].interrupt();
        threads[2].interrupt();
    }
}


输出结果是:
just before lock.lockInterruptibly();
Thread-0ticketNum is10
just before lock.lockInterruptibly();
Thread-4取消一张
java.lang.InterruptedException
Thread-2取消一张
java.lang.InterruptedException
模仿select * from table for update,执行的很慢,买了一张Thread-0ticketNum is9
Thread-1ticketNum is9
模仿select * from table for update,执行的很慢,买了一张Thread-1ticketNum is8
Thread-3ticketNum is8
模仿select * from table for update,执行的很慢,买了一张Thread-3ticketNum is7
Thread.currentThread().getName()+ticketNum is7
模仿select * from table for update,执行的很慢,买了几张Thread-6ticketNum is4
Thread-5ticketNum is4
模仿select * from table for update,执行的很慢,买了一张Thread-5ticketNum is3


ReentrantLock类的tryLock和tryLock(时间) (视频下载) (全部书籍)

马 克-to-win:tryLock的方法就是试一下,如果能得到锁,就返回真,如果当时得不到,马上就返回假,绝不等。tryLock(时间)的用法就是 在规定的时间内设法得到锁。如果在规定的时间内最终不能得到锁,就返回假。注意,这个方法是可以被打断的,打断后的处理方法和上面的例子 lockInterruptibly的处理一样。

例1.9.8_a:
import java.util.concurrent.TimeUnit;
import java.util.concurrent.locks.ReentrantLock;
class A {
    private ReentrantLock lock = new ReentrantLock();
    int ticketNum = 10;
    public void buyOne() {
        System.out.println("just before lock.lockInterruptibly();");
        boolean succeed = lock.tryLock();
        if (succeed) {
            System.out.println(Thread.currentThread().getName()
                    + "ticketNum is" + ticketNum);
            if (ticketNum > 0) {
                try {
                    Thread.sleep(5000);
                } catch (InterruptedException e) {
                    e.printStackTrace();
                }
                ticketNum--;
                System.out
                        .println("模仿select * from table for update,执行的很慢,买了一张"
                                + Thread.currentThread().getName()
                                + "ticketNum is" + ticketNum);
            }
            lock.unlock();
        }else{
            System.out.println("没获得锁,一张");
        }
    }

    public void buyBatch(int num) throws InterruptedException {
        System.out.println("just before lock.lockInterruptibly();");
        boolean succeed = false;
        boolean sleepSucceed = false;
        succeed = lock.tryLock(2, TimeUnit.SECONDS);
        if (succeed) {
            System.out.println("Thread.currentThread().getName()+ticketNum is"
                    + ticketNum);
            try {
                Thread.sleep(5000);
                sleepSucceed=true;
            } catch (InterruptedException e) {
                System.out.println("已经获得了锁了,几张的睡觉被打断,表示预备工作没做好,什么也不买");
            }
            if (ticketNum >= num&&sleepSucceed) {
                ticketNum = ticketNum - num;
                System.out
                        .println("模仿select * from table for update,执行的很慢,买了几张"
                                + Thread.currentThread().getName()
                                + "ticketNum is" + ticketNum);
            }
            lock.unlock();
        }else{
            System.out.println("没获得锁,几张");
        }
    }
}

class MyThread1 extends Thread {
    A a;
    public MyThread1(A a) {
        this.a = a;
    }
    public void run() {
        a.buyOne();
    }
}

class MyThread2 extends Thread {
    A a;
    public MyThread2(A a) {
        this.a = a;
    }
    public void run() {
        try {
            a.buyBatch(3);
        } catch (InterruptedException e) {
            System.out.println("正要获得锁的过程当中呢,几张的线程被打断");
        }
    }
}
public class TestMark_to_win {
    public static void main(String[] args) throws InterruptedException {
        MyThread1[] threads = new MyThread1[2];
        A a = new A();
        for (int i = 0; i < 2; i++) {
            threads[i] = new MyThread1(a);
        }
        MyThread2 myThread2 = new MyThread2(a);
        threads[0].start();
Thread.sleep(50);
        myThread2.start();
        threads[1].start();
//        Thread.sleep(50);
//        myThread2.interrupt();
    }
}


(这种情况是tryLock(2, TimeUnit.SECONDS);根本没得到锁)运行结果:

just before lock.lockInterruptibly();
Thread-0ticketNum is10
just before lock.lockInterruptibly();
没获得锁,一张
没获得锁,几张
模仿select * from table for update,执行的很慢,买了一张Thread-0ticketNum is9


例1.9.8_b:(只需要把上面实验的主程序改变一下就行,其他都不用变。)

public class TestMark_to_win {
    public static void main(String[] args) throws InterruptedException {
        MyThread1[] threads = new MyThread1[2];
        A a = new A();
        for (int i = 0; i < 2; i++) {
            threads[i] = new MyThread1(a);
        }
        MyThread2 myThread2 = new MyThread2(a);
        threads[0].start();
        Thread.sleep(50);
        myThread2.start();
        threads[1].start();
        Thread.sleep(50);
        myThread2.interrupt();
    }
}


(这种情况是tryLock(2, TimeUnit.SECONDS);正要获得锁的过程当中被打断了)运行结果:

just before lock.lockInterruptibly();
Thread-0ticketNum is10
just before lock.lockInterruptibly();
没获得锁,一张
正要获得锁的过程当中呢,几张的线程被打断
模仿select * from table for update,执行的很慢,买了一张Thread-0ticketNum is9

例1.9.8_c:

public class TestMark_to_win {
    public static void main(String[] args) throws InterruptedException {
        MyThread1[] threads = new MyThread1[2];
        A a = new A();
        for (int i = 0; i < 2; i++) {
            threads[i] = new MyThread1(a);
        }
        MyThread2 myThread2 = new MyThread2(a);
       
        myThread2.start();
        Thread.sleep(50);
        threads[0].start();
        threads[1].start();
//        Thread.sleep(50);
//        myThread2.interrupt();
    }
}


(这种情况是tryLock(2, TimeUnit.SECONDS);获得了锁)运行结果:

just before lock.lockInterruptibly();
Thread.currentThread().getName()+ticketNum is10
just before lock.lockInterruptibly();
没获得锁,一张
just before lock.lockInterruptibly();
没获得锁,一张
模仿select * from table for update,执行的很慢,买了几张Thread-2ticketNum is7


例1.9.8_d:

public class TestMark_to_win {
    public static void main(String[] args) throws InterruptedException {
        MyThread1[] threads = new MyThread1[2];
        A a = new A();
        for (int i = 0; i < 2; i++) {
            threads[i] = new MyThread1(a);
        }
        MyThread2 myThread2 = new MyThread2(a);
       
        myThread2.start();
        Thread.sleep(50);
        threads[0].start();
        threads[1].start();
        Thread.sleep(50);
        myThread2.interrupt();
    }
}


(这种情况是tryLock(2, TimeUnit.SECONDS);已经获得了锁,【注意虽然写的是2秒,但是myThread2是排在队列里第一个的,根本不用等,更别说是等2秒,2秒是真正等时的极限。】正在干事的的过程当中被打断了)运行结果:


just before lock.lockInterruptibly();
Thread.currentThread().getName()+ticketNum is10
just before lock.lockInterruptibly();
没获得锁,一张
just before lock.lockInterruptibly();
没获得锁,一张
已经获得了锁了,几张的睡觉被打断,表示预备工作没做好,什么也不买


volatile关键字与原子操作

volatile关键字到底是干什么的?(新手可略过)

我们先简要了解一下java虚拟机的内存模型。就像数据从物理内存拷贝到cpu高速缓存,进行操作完,再把数据返回到内存一样,为了屏蔽CPU高速缓存和 内存复杂细节且赢得跨平台的效果,java把所有的变量都存在主存(相当于物理内存)当中,每个线程都有自己的工作内存(相当于CPU高速缓存)。线程在 自己的工作内存做操作,不能直接对主存进行操作,最后把结果返回到主存。如果一个变量有volatile(易变的意思)修饰词,这意味着当有一个线程修改了这个变量,系 统会把工作内存当中的变化强制立刻反应在主存当中。其他线程要想读这个变量,也会被强迫读变化了的新值。volatile其实就保证了此变量无论怎么变, 任何线程看都是最新的。当两个线程,根据一个共同的信号,做互动时,一定要加volatile,保证这个信号是最新的。

volatile,有人说能够控制程序的语句有序性,但jvm并不能保证在所有的平台上都能够做到这一点,所以我的书中 就不赘述了。既然volatile控制程序语句的有序性不能保证所有的平台都正确运行,基于它的技术“双重检查锁”创建单态对象也就变得不可靠了,本书也 就不覆盖了。


什么叫原子操作? (视频下载) (全部书籍)

就 是无法被别的线程打断的操作。要么不执行,要么就执行成功。例如:x=3是原子操作。过程就是先把工作内存的x赋成3,再把主存的x赋成3。y=x不是原 子操作,它涉及在工作内存先把x值读出来,再把这个值赋给y。x++或x=x+1也不是原子操作,它涉及取值,自加和赋值。下面我们就用一个例子来说明x ++不是原子操作所带来的问题。


class NumContainer {
    int num;
}
class MulThreMarkToWin extends Thread {
    NumContainer nc;
    public void increase() {
        nc.num++;
    }
    public MulThreMarkToWin(NumContainer nc) {
        this.nc = nc;
    }
    public void run() {
        increase();
    }
}

public class TestMark_to_win {
    public static void main(String[] args) {
        NumContainer nc = new NumContainer();
        MulThreMarkToWin[] threads = new MulThreMarkToWin[10000];
        for (int i = 0; i < 10000; i++) {
            threads[i] = new MulThreMarkToWin(nc);
        }
        for (int i = 0; i < 10000; i++) {
            threads[i].start();
        }
        try {
            Thread.sleep(6000);
        } catch (InterruptedException e) {
            e.printStackTrace();
        }
        System.out.println(nc.num);
    }
}

输出结果是:

9997


结果为什么不是10000?10000个线程都执行一遍num++;按理说结果应该是10000。现在的结果却总是小于 等于10000。这就要从++操作的非原子性讲起。想象在某个时刻,两个线程同时读出num值等于30,同时又在自己的工作内存做了++操作,之后先后把 31重新写回主存。这样结果就小于10000了。顺便说一句,这种情况即使加了volatile关键字,也解决不了问题。有volatile也照样覆盖, 因为volatile只能保证读时是最新的。但他解决不了原子问题。像刚才这样,该覆盖时照样覆盖。那怎么解决呢?只有通过原子操作。


import java.util.concurrent.atomic.AtomicInteger;

class MulThreMarkToWin extends Thread {
    private AtomicInteger inc;
    public void increase() {
        inc.getAndIncrement();
    }
    public MulThreMarkToWin(AtomicInteger inc) {
        this.inc = inc;
    }
    public void run() {
        increase();
    }
}

public class TestMark_to_win {
    public static void main(String[] args){
        AtomicInteger inc = new AtomicInteger();
        MulThreMarkToWin[] threads = new MulThreMarkToWin[10000];
        for (int i = 0; i < 10000;i++) {
            threads[i] = new MulThreMarkToWin(inc);
        }
        for (int i = 0; i < 10000;i++) {
            threads[i].start();
        }
        try {
            Thread.sleep(3000);
        } catch (InterruptedException e) {
            e.printStackTrace();
        }
        System.out.println(inc);
    }
}


输出结果是:

10000


volatile加原子操作能取代synchronized和锁吗?(视频下载) (全部书籍)答案是否定的。比如需求如果是,在并发环境下判断票数是否大于零,如果大于零就买票。 判断加更新总体是个原子操作。这种情况只能用锁和synchronized。volatile加原子操作解决不了问题。其实想彻底解决并发环境的问题,只 能用synchronized和锁。volatile和原子操作只能在有些特殊的情况下解决一点小问题(比如不加判断直接更新),当问题变得复杂时,volatile和原子操作就完全不能胜任了。


synchronized 是不是能够代替原子操作?不能, (视频下载) (全部书籍)因为synchronized方法在执行的过程当中,它方法体内的变量可以被其他非synchronized方法得到。而 如果用原子操作,其他方法就看不到了。这点区别就造成了,如果有需求要求synchronized方法体内的变量不能被其他方法看到,就要用原子操作。 但是貌似这种需求比较少。


10.死锁 (视频下载) (全部书籍)


当两个线程循环依赖于一对同步对象(monitor)时将发生死锁。马克-to-win例如:
一个线程进入对象ObjA上的监视器,而另一个线程进入对象ObjB上的监视器。如果ObjA中的线程试图调用ObjB上的任何 synchronized 方法,同时,反向的情况也发生,就将发生死锁。
死锁很少发生,但一旦发生就很难调试。


在以下例子中:a正在等待b释放,b也正在等待a释放,a怎么才能释放锁呢?只有a往前移动一个语句,执行完disp,a就能自动释放锁,但执行disp需要b释放锁,所以因为执行不了disp,所以a不能释放锁。b也一样,所以大家就在这互相等,从而发生了死锁。

对 于下面的例子:马克-to-wind1.start()作为一个线程,获得d1的锁。为什么?因为synchronized public void run().所以run()的synchronized不能去掉。d2.start()作为一个线程获得d2的锁。没有问题,所以打印出来两个“in ru”。然后,在d1's run()的 d.disp()使得d1试图从d2获得一个锁,因为在这一刻,d.disp()意味着d1.d.disp()= d2.disp(),意味着d1试图得到一个锁从d2,反之亦然。

如果任何synchronized 删除,不会发生死锁,但安全性降低。


例1.10.1-本章源码

class DeadLockExam extends Thread {
    DeadLockExam d;

    synchronized void disp() {
        System.out.println("in di");
    }

    synchronized public void run() {
        System.out.println("in ru");
        try {
            Thread.sleep(1000);
        } catch (Exception e) {
        }
        d.disp();
    }
}

public class TestMark_to_win {
    public static void main(String[] args) {
        DeadLockExam d1 = new DeadLockExam();
        DeadLockExam d2 = new DeadLockExam();
        d1.d = d2;
        d2.d = d1;
        d1.start();
        d2.start();
    }
}

运行结果是

in ru
in ru


11.wait()、notify()和notifyAll()方法 (视频下载) (全部书籍)

新手不必过认真研究,有兴趣的可研究

这三个方法仅在 synchronized 方法中才能被调用。

wait()方法告知被调用的线程退出监视器马克-to-win并进入等待状态,直到其他线程进入相同的监视器并调用 notify( ) 方法。

notify( ) 方法通知同一对象上某一个调用 wait( )线程。 If any threads are waiting on this object, one of them is chosen to be awakened. The choice is arbitrary and occurs at the discretion of the implementation.

notifyAll() 方法通知调用 wait() 的所有线程,竞争胜利的线程将先运行。 The awakened threads will compete in the usual manner with any other threads that might be actively competing to synchronize on this object; the awakened threads enjoy no reliable privilege or disadvantage in being the next thread to lock this object。

结论:notifyall是竞争,而notify是由具体实施的jvm决定的。


见下例:

例1.11.1-本章源码


class DishMark_to_win {
    private String food = "";
    public synchronized String eat() {
        try {
            System.out.println("需要等一会,暂时无饭");
/* 当执行下面的wait,这个线程将会暂停在这,然后当下列serve执行notify,然后这个线程将从这继续执行。*/
            wait();
            System.out.println("接到通知可以了");
        } catch (InterruptedException e) {
        }
        return food;
    }

    public synchronized void serve(String f) {
        this.food = f;
        /*下面二者都行*/
        notify();
  //    notifyAll();
        System.out.println("notify本身并不会释放同步锁,synchronized块儿完了,才会释放锁");
        try {
            Thread.sleep(9000);
        } catch (Exception e) {
        }
        System.out.println("等我歇9秒,synchronized块儿完了,你才能获得锁,再给你端上去");

    }
}

class Customer extends Thread {
    private DishMark_to_win myDishMark_to_win;

    public Customer(DishMark_to_win d) {
        this.myDishMark_to_win = d;
    }

    public void run() {
        System.out.println(myDishMark_to_win.eat());
    }
}

class Restrant extends Thread {
    private DishMark_to_win myDishMark_to_win;

    public Restrant(DishMark_to_win d) {
        this.myDishMark_to_win = d;
    }

    public void run() {
        try {
            Thread.sleep(4000);
        } catch (Exception e) {
        }
        System.out.println("歇了4秒");
        myDishMark_to_win.serve("鱼香肉丝");
    }
}

public class Test {
    public static void main(String[] args) {
        DishMark_to_win d = new DishMark_to_win();
        Customer c = new Customer(d);
        Restrant r = new Restrant(d);
        c.start();
        try {
            Thread.sleep(100);
        } catch (Exception e) {
        }
        r.start();
    }
}

运行结果是

需要等一会,暂时无饭
歇了4秒
notify本身并不会释放同步锁,synchronized块儿完了,才会释放锁
等我歇9秒,synchronized块儿完了,你才能获得锁,再给你端上去
接到通知可以了
鱼香肉丝

12.一个高层线程工具类(Timer) (视频下载) (全部书籍)


Timer 是一个线程工具。它方便线程来调度任务马克-to-win在后台执行。可能会安排任务为一次性执行,或定期重复执行,下面给出例子:

例1.12.1-本章源码

import java.util.Timer;
import java.util.TimerTask;

class TimExample {
    Timer timer;

    public TimExample(int seconds) {
        timer = new Timer();
        /*
          public void schedule(TimerTask task,long delay) Schedules the specified task for execution after the specified delay.安排执行指定的任务在指定延迟后
         */
        timer.schedule(new CTask(), seconds * 1000);
    }

    // Inner class
    class CTask extends TimerTask {
        /*
         * public abstract void run() The action to be performed by this timer
         * task.被这个定时器所做的行为
         */
        public void run() {
            System.out.println("时间到!");

        }
    }

}

public class TestMark_to_win {
    public static void main(String args[]) {
        new TimExample(3);
        System.out.println("here");
    }

}

运行结果是

here
时间到!


附录:本章源码 (视频下载) (全部书籍)

例:1.3.1-本章源码
public class Test {
    public static void main(String args[]) {

        Thread t = Thread.currentThread();

        System.out.println("当前线程是: " + t);

        t.setName("马克-to-win的线程");
        System.out.println("当前线程名是: " + t);
    }
}

输出结果:
当前线程是: Thread[main,5,main]
当前线程名是: Thread[马克-to-win的线程,5,main]


例:1.3.2-本章源码
class ThreadMark_to_win extends Thread {
    public void run() {
        for (int i = 0; i < 3; i++) {
            try {
                Thread.sleep(1000);
            } catch (InterruptedException e) {
                e.printStackTrace();
            }
            System.out.println("子线程i = " + i);
        }
    }
}
public class Test {
    public static void main(String[] args)  {
        Thread t = new ThreadMark_to_win();
        t.start();
        for (int i = 0; i < 3; i++) {
            try {
                Thread.sleep(1000);
            } catch (InterruptedException e) {
                e.printStackTrace();
            }
            System.out.println("主线程i = " + i);
        }
    }
}
输出结果:
主线程i = 0
子线程i = 0
主线程i = 1
子线程i = 1
主线程i = 2
子线程i = 2

例:1.3.2_1-本章源码
class ThreadMark_to_win extends Thread {
    public void run() {
        for (int i = 0; i < 7; i++) {
            try {
                Thread.sleep(1000);
            } catch (InterruptedException e) {
                e.printStackTrace();
            }
            System.out.println("子线程i = " + i);
        }
    }
}
public class Test {
    public static void main(String[] args)  {
        Thread t = new ThreadMark_to_win();
        t.start();
        for (int i = 0; i < 3; i++) {
            try {
                Thread.sleep(1000);
            } catch (InterruptedException e) {
                e.printStackTrace();
            }
            System.out.println("主线程i = " + i);
        }
        throw new ArithmeticException("divide by 0");
    }
}
输出结果:
主线程i = 0
子线程i = 0
主线程i = 1
子线程i = 1
子线程i = 2
主线程i = 2Exception in thread "main"
java.lang.ArithmeticException: divide by 0
    at Test.main(Test.java:25)
子线程i = 3
子线程i = 4
子线程i = 5
子线程i = 6

例:1.3.2_2-本章源码
class ThreadMark_to_win extends Thread {
    public void run() {
        for (int i = 0; i < 3; i++) {
            try {
                Thread.sleep(1000);
            } catch (InterruptedException e) {
                e.printStackTrace();
            }
            System.out.println("子线程i = " + i);
        }
        throw new ArithmeticException("divide by 0");
    }
}
public class Test {
    public static void main(String[] args)  {
        Thread t = new ThreadMark_to_win();
        t.start();
        for (int i = 0; i < 6; i++) {
            try {
                Thread.sleep(1000);
            } catch (InterruptedException e) {
                e.printStackTrace();
            }
            System.out.println("主线程i = " + i);
        }
    }
}

输出结果:
子线程i = 0
主线程i = 0
子线程i = 1
主线程i = 1
子线程i = 2
Exception in thread "Thread-0" java.lang.ArithmeticException: divide by 0
    at ThreadMark_to_win.run(Test.java:11)
主线程i = 2
主线程i = 3
主线程i = 4
主线程i = 5

例:1.3.3-本章源码

class CommonClassMark_to_win implements Runnable {
    public void run() {
        for (int i = 0; i < 3; i++) {
            try {
                Thread.sleep(1000);
            } catch (InterruptedException e) {
                e.printStackTrace();
            }
            System.out.println("子线程i = " + i);
        }
    }
}
public class Test {
    public static void main(String[] args)  {
        CommonClassMark_to_win cc = new CommonClassMark_to_win();
        Thread t=new Thread(cc);
        t.start();
        for (int i = 0; i < 3; i++) {
            try {
                Thread.sleep(1000);
            } catch (InterruptedException e) {
                e.printStackTrace();
            }
            System.out.println("主线程i = " + i);
        }
    }
}
输出结果:
主线程i = 0
子线程i = 0
子线程i = 1
主线程i = 1
主线程i = 2
子线程i = 2

例:1.5.1-本章源码

class MyThreadMark_to_win extends Thread{
    private boolean stop;
    public void run() {
        for (int i = 0; i < 100; i++) {
            if (stop) {
                System.out.println("退出了");
                return;
            }
            try {
                Thread.sleep(200);
            } catch (Exception e) {
                e.printStackTrace();

            }
            System.out.println("i = " + i);
        }
    }

    public void setStop(boolean stop) {
        this.stop = stop;
    }
}

public class Test {
    public static void main(String[] args) {
        MyThreadMark_to_win mt = new MyThreadMark_to_win();
        mt.start();
        try {
            Thread.sleep(300);
        } catch (Exception e) {
        }
        mt.setStop(true);
    }
}

输出结果:

i = 0
i = 1
退出了

例:1.5.1_1-本章源码

class MyThreadMark_to_win extends Thread{
    private boolean stop;
    public void run() {
        for (int i = 0; i < 100; i++) {
            if (stop) {
                System.out.println("退出了");
                throw new ArithmeticException("divide by 0");
            }
            try {
                Thread.sleep(200);
            } catch (Exception e) {
                e.printStackTrace();

            }
            System.out.println("i = " + i);
        }
    }

    public void setStop(boolean stop) {
        this.stop = stop;
    }
}

public class Test {
    public static void main(String[] args) {
        MyThreadMark_to_win mt = new MyThreadMark_to_win();
        mt.start();
        try {
            Thread.sleep(300);
        } catch (Exception e) {
        }
        mt.setStop(true);
    }
}

输出结果:

i = 0
Exception in thread "Thread-0" java.lang.ArithmeticException: divide by 0
    at MyThreadMark_to_win.run(Test.java:7)
i = 1
退出了


例:1.5.2-本章源码

class ThreadMark_to_win extends Thread {
    public void run() {
        for (int i = 0; i < 100; i++) {
            try {                                  
                Thread.sleep(100);
            } catch (InterruptedException e) {
                System.out.println("我被打断");
                return;
            }
            System.out.println("i = " + i);
        }
    }
}
public class Test {
    public static void main(String[] args) {
        ThreadMark_to_win mt = new ThreadMark_to_win();
        mt.start();
        try {
            Thread.sleep(250);
        } catch (Exception e) {
            e.printStackTrace();
        }
/*mt.interrupt();等于进入到那个线程中,抛出一个InterruptedException异常。当然那个线程的catch能捕获到了*/       
        mt.interrupt();
    }
}

输出结果:

i = 0
i = 1
我被打断

例:1.5.2_1-本章源码

class ThreadMark_to_win extends Thread {
    Thread mainT;
    public void run() {
        try {
            Thread.sleep(100);
        } catch (InterruptedException e) {
            System.out.println("我是子线程,被打断");
            return;
        }
        mainT.interrupt();
    }
    public void setMainThread(Thread t1) {
        mainT = t1;
    }
}
public class Test {
    public static void main(String[] args) {
        Thread mainT = Thread.currentThread();
        ThreadMark_to_win st = new ThreadMark_to_win();
        st.setMainThread(mainT);
        st.start();
        try {
            Thread.sleep(250);
        } catch (InterruptedException e) {
            System.out.println("我是主线程,被打断");
        }
    }
}

输出结果:
我是主线程,被打断

例:1.5.2_2-本章源码

class ThreadMark_to_win extends Thread {
    Thread st1;
    public void run() {
        try {
            Thread.sleep(100);
        } catch (InterruptedException e) {
            System.out.println("我是子线程,被打断");
        }
        st1.interrupt();
        try {
            Thread.sleep(300);
        } catch (InterruptedException e) {
            System.out.println("我是子线程,第二次睡时被打断");
            return;
        }
    }
    public void setSilblingThread1(Thread t1) {
        st1 = t1;
    }
}
class ThreadMark_to_win1 extends Thread {
    Thread st;
    public void run() {
        try {
            Thread.sleep(200);
        } catch (InterruptedException e) {
            System.out.println("我是子线程1,被打断");
        }
        st.interrupt();
    }
    public void setSilblingThread(Thread t1) {
        st = t1;
    }
}
public class Test {
    public static void main(String[] args) {
        ThreadMark_to_win st = new ThreadMark_to_win();
        ThreadMark_to_win1 st1 = new ThreadMark_to_win1();
        st.setSilblingThread1(st1);
        st1.setSilblingThread(st);
        st.start();
        st1.start();

    }
}

输出结果:
我是子线程1,被打断
我是子线程,第二次睡时被打断

例:1.5.3-本章源码

class ThreadMark_to_win extends Thread {
    int e;
    public void run() {
        for (int i = 0; i < 4; i++) {
            e = e + i;
        }
        System.out.println("完成");
    }
}
public class Test {
    public static void main(String[] args) {
        ThreadMark_to_win tm = new ThreadMark_to_win();
        tm.start();
        try {
                       tm.join();
        } catch (InterruptedException e) {
            e.printStackTrace();
        }
       
        System.out.println("e = " + tm.e);
    }
}

输出结果:

完成
e = 6


例:1.5.3_1-本章源码

class ThreadMark_to_win extends Thread {
    Thread mainT;
    int e;
    public void run() {
        for (int i = 0; i < 10; i++)
        {
            try {
                Thread.sleep(100);
            } catch (InterruptedException e1) {
                e1.printStackTrace();
            }
            if(i==4) mainT.interrupt();
            e = e + i;
        }
        System.out.println("完成"+"e 在子线程"+e);
    }
    public void setMainThread(Thread t1) {
        mainT=t1;
       
    }
}
public class Test {
    public static void main(String[] args) {
        Thread mainT = Thread.currentThread();
        ThreadMark_to_win tm = new ThreadMark_to_win();
        tm.setMainThread(mainT);
        tm.start();
        try {
            tm.join();
        } catch (InterruptedException e) {
            System.out.println("我是主程序, 也被打断");
        }
        System.out.println("主线程e = " + tm.e);
    }
}

输出结果:
我是主程序, 也被打断
主线程e = 10
完成e 在子线程45

例:1.5.4-本章源码

import java.lang.Thread.UncaughtExceptionHandler;
class ThreadMark_to_win extends Thread
{
  public void run()
  {
    for(int i=0;i<3;i++)
    {  
        try {
            Thread.sleep(100);
        } catch (InterruptedException e) {
            e.printStackTrace();
        }
        System.out.println("在子线程"+i);
       
    }
    throw new RuntimeException("在子线程,我自己抛出的一个异常");
  }
  String getMyName()
  {
      return "马克-to-win在子线程";
  }
}
public class Test
{
  public static void main(String[] args)
  {
    ThreadMark_to_win tm = new ThreadMark_to_win();
    tm.setUncaughtExceptionHandler(new UncaughtExceptionHandler()
    {
      public void uncaughtException(Thread t, Throwable e)
      {
        System.out.println("在主程序处理呢  "+((ThreadMark_to_win)t).getMyName() + " : " + e.getMessage());
      }
    });
    tm.start();
    for(int i=0;i<10;i++)
    {  
        try {
            Thread.sleep(100);
        } catch (InterruptedException e) {
            e.printStackTrace();
        }
        System.out.println("在主线程"+i);
       
    }
  }
}
输出结果:
在主线程0
在子线程0
在主线程1
在子线程1
在子线程2
在主线程2
在主程序处理呢  马克-to-win在子线程 : 在子线程,我自己抛出的一个异常
在主线程3
在主线程4
在主线程5
在主线程6
在主线程7
在主线程8
在主线程9

例:1.5.4_2-本章源码

import java.lang.Thread.UncaughtExceptionHandler;
class ThreadMark_to_win extends Thread  {
    Thread mainT;
    Test test;
    ThreadMark_to_win(Thread t1,Test t2)
    {
        mainT = t1;
        test=t2;
        mainT.setUncaughtExceptionHandler(new UncaughtExceptionHandler() {
            public void uncaughtException(Thread t, Throwable e) {
                System.out.println("在子程序处理呢, 传进来的参数是"+test.name+"   "+t.getName()+"   "+ e.getMessage());
            }
        });       
    }
    public void run()
    {
        for(int i=0;i<3;i++)
        {  
            try {
                Thread.sleep(100);
            } catch (InterruptedException e) {
            }
            System.out.println("在子线程"+i);
        }
    }
}
public class Test {
    String name="马克-to-win在主线程";
    public static void main(String[] args) {
        Thread mainT = Thread.currentThread();
        Test t=new Test();
        ThreadMark_to_win tm = new ThreadMark_to_win(mainT,t);
        tm.start();
        for (int i = 0; i < 3; i++)
        {
            try {
                Thread.sleep(100);
            } catch (InterruptedException e) {
            }
            System.out.println("在主线程" + i);
        }
        throw new RuntimeException("在主线程,我自己抛出的一个异常");
    }
}

输出结果:
在主线程0
在子线程0
在主线程1
在子线程1
在主线程2
在子程序处理呢, 传进来的参数是马克-to-win在主线程   main   在主线程,我自己抛出的一个异常
在子线程2


例:1.5.4_3-本章源码

import java.lang.Thread.UncaughtExceptionHandler;
class ThreadMark_to_win  {
    Thread mainT;
    Test test;
    ThreadMark_to_win(Thread t1,Test t2)
    {
        mainT = t1;
        test=t2;
        mainT.setUncaughtExceptionHandler(new UncaughtExceptionHandler() {
            public void uncaughtException(Thread t, Throwable e) {
                System.out.println("在子程序处理呢, 传进来的参数是"+test.name+"   "
                        +t.getName()+"   "+ e.getMessage());
            }
        });       
    }
}
public class Test {
    String name="马克-to-win在主线程";
    public static void main(String[] args) {
        Thread mainT = Thread.currentThread();
        Test t=new Test();
        ThreadMark_to_win tm = new ThreadMark_to_win(mainT,t);
        for (int i = 0; i < 3; i++)
            System.out.println("在主线程" + i);
        throw new RuntimeException("在主线程,我自己抛出的一个异常");
    }
}

输出结果:

在主线程0
在主线程1
在主线程2
在子程序处理呢, 传进来的参数是马克-to-win在主线程   main   在主线程,我自己抛出的一个异常


例:1.5.5-本章源码

class ThreadMark_to_win extends Thread {
    private String s;
    public ThreadMark_to_win(String s) {
        this.s = s;
    }
    public void run() {
        for (int i = 0; i < 10; i++) {
            try {
                Thread.sleep(100);
            } catch (InterruptedException e) {
            }
            System.out.println(s);
        
            Thread.yield();
        }
    }
}

public class Test {
    public static void main(String[] args) {
        Thread t1 = new ThreadMark_to_win("线程1");
        Thread t2 = new ThreadMark_to_win("线程2");
        t1.start();
        t2.start();
    }
}

运行结果:
线程1
线程2
线程2
线程1
线程1
线程2
线程2
线程1
线程2
线程1
线程1
线程2
线程2
线程1
线程1
线程2
线程2
线程1
线程2
线程1


例:1.6.1-本章源码

class ThreadMark_to_win extends Thread {
    static boolean go=true;
    private String s;
    int i;
    public ThreadMark_to_win(String s) {
        this.s = s;
    }
    public void run() {
        while(go){
            System.out.println(s+" 到了  "+i++);
            try {
                this.sleep(1); // 减小这里的毫秒数,可以让我们更容易观察到结果
            } catch (InterruptedException ex) {
                ex.printStackTrace();
            }
        }
    }
}

public class Test {
    public static void main(String[] args) {
        Thread t1 = new ThreadMark_to_win("线程1");
        Thread t2 = new ThreadMark_to_win("线程2");
        t1.setPriority(1);
        t2.setPriority(10);
        t1.start();
        t2.start();
        try {
            Thread.sleep(30000);
        } catch (InterruptedException e) {
            e.printStackTrace();
        }
        ThreadMark_to_win.go=false;
       
    }
}

输出结果:

线程1 到了  0
线程2 到了  0
线程1 到了  1
线程2 到了  1
线程2 到了  2
线程1 到了  2
线程2 到了  3
线程1 到了  3
线程2 到了  4
线程1 到了  4
线程2 到了  5
线程1 到了  5
线程2 到了  6
线程1 到了  6


线程1 到了  3335
线程2 到了  4753
线程2 到了  4754
线程2 到了  4755
线程2 到了  4756
线程1 到了  3336
线程2 到了  4757
线程2 到了  4758
线程2 到了  4759


例:1.7.1_1-本章源码

class ThreadMark_to_win extends Thread {
    public void run(){
        for(int i = 1; i <= 15;i++){
            try{
                Thread.sleep(100);  
            } catch (InterruptedException ex){
                ex.printStackTrace();
            }
            System.out.println("子线程 "+i);
        }
    }
}
public class Test extends Thread{
    public static void main(String [] args){
       ThreadMark_to_win tm = new ThreadMark_to_win();
       tm.setDaemon(true);
       tm.start();
       System.out.println("子线程是精灵线程吗?" +tm.isDaemon());
       try{
           Thread.sleep(1000);
       } catch (InterruptedException ex){
           ex.printStackTrace();
       }
       System.out.println(Thread.currentThread().getName()+"已经结束");
   }

输出结果:

子线程是精灵线程吗?true
子线程 1
子线程 2
子线程 3
子线程 4
子线程 5
子线程 6
子线程 7
子线程 8
子线程 9
main已经结束
子线程 10

例:1.7.1_2-本章源码

class ThreadMark_to_win extends Thread {
    public void run(){
        for(int i = 1; i <= 15;i++){
            try{
                Thread.sleep(100);  
            } catch (InterruptedException ex){
                ex.printStackTrace();
            }
            System.out.println("子线程 "+i);
        }
    }
}
public class Test extends Thread{
    public static void main(String [] args){
       ThreadMark_to_win tm = new ThreadMark_to_win();
//       tm.setDaemon(true);
       tm.start();
       System.out.println("子线程是精灵线程吗?" +tm.isDaemon());
       try{
           Thread.sleep(1000);
       } catch (InterruptedException ex){
           ex.printStackTrace();
       }
       System.out.println(Thread.currentThread().getName()+"已经结束");
   }

输出结果:
子线程是精灵线程吗?false
子线程 1
子线程 2
子线程 3
子线程 4
子线程 5
子线程 6
子线程 7
子线程 8
子线程 9
main已经结束
子线程 10
子线程 11
子线程 12
子线程 13
子线程 14
子线程 15


例:1.8.1-本章源码

class Photoshop {
    private Photoshop() {
    }
    private static Photoshop photoshop = null;// 这个值独立于任何对象存在,实例化任何对象之前,这个成员就有可能有值。
    public static Photoshop getInstanceQixy() {
        if (photoshop == null) {
            photoshop = new Photoshop();
        }
        return photoshop;
    }
}
public class Test {
    public static void main(String[] args) {
        Photoshop photoshopI1 = Photoshop.getInstanceQixy();
        Photoshop photoshopI2 = Photoshop.getInstanceQixy();
        System.out.println(photoshopI1+"  "+photoshopI2);
    }
}

输出结果:
Photoshop@1b67f74  Photoshop@1b67f74


例:1.8.1_b-本章源码

class Photoshop {
    private Photoshop() {
    }
    private static Photoshop photoshop = null;
    public static Photoshop getInstanceQixy() {
        if (photoshop == null) {
            photoshop = new Photoshop();
        }
        return photoshop;
    }
}
class MyThreadMark_to_win extends Thread {
    public void run() {
        Photoshop photoshopI1 = Photoshop.getInstanceQixy();
        System.out.println(Thread.currentThread().getName() + "实例是 "
                + photoshopI1);
    }
}
public class Test {
    public static void main(String[] args) {
        MyThreadMark_to_win mt1 = new MyThreadMark_to_win();
        MyThreadMark_to_win mt2 = new MyThreadMark_to_win();
        mt1.start();
        mt2.start();
    }
}

输出结果有时是(占少数):
Thread-1实例是 Photoshop@1270b73
Thread-0实例是 Photoshop@89ae9e


而输出结果多数是:(占多数)
Thread-0实例是 Photoshop@a62fc3
Thread-1实例是 Photoshop@a62fc3


例:1.8.2-本章源码

class BookMark_to_win {
    int bookNum=10;
    void onlySellOne() {
        if (bookNum > 0) {
            System.out.println(Thread.currentThread().getName()
                    + " before" + bookNum);
            bookNum--;
            try {
                Thread.sleep(1000);
            } catch (Exception e) {
            }
            System.out.println(Thread.currentThread().getName()
                    + " after " + bookNum);
        }
    }
}
public class Test {
    public static void main(String[] args) {
        BookMark_to_win bookM = new BookMark_to_win();
        while (bookM.bookNum>0) {
            bookM.onlySellOne();
        }
    }
}

输出结果:

main before10
main after 9
main before9
main after 8
main before8
main after 7
main before7
main after 6
main before6
main after 5
main before5
main after 4
main before4
main after 3
main before3
main after 2
main before2
main after 1
main before1
main after 0


例:1.8.2_b-本章源码

class BookMark_to_win {
    int bookNum=10;
    void onlySellOne() {
        if (bookNum > 0) {
            System.out.println(Thread.currentThread().getName()
                    + " before" + bookNum);
            bookNum--;
            try {
                Thread.sleep(1000);
            } catch (Exception e) {
            }
            System.out.println(Thread.currentThread().getName()
                    + " after " + bookNum);
        }
    }
}
class MyThread extends Thread {
    BookMark_to_win book;
    MyThread(BookMark_to_win tmp) {
        this.book = tmp;
    }
    public void run() {
     
        while (book.bookNum>0) {
            book.onlySellOne();
        }
    }
}
public class Test {
    public static void main(String[] args) {
        BookMark_to_win bookM = new BookMark_to_win();
        Thread t1 = new MyThread(bookM);
        Thread t2 = new MyThread(bookM);
        t1.start();
        t2.start();
    }
}

输出结果:

Thread-0 before10
Thread-1 before9
Thread-0 after 8
Thread-0 before8
Thread-1 after 7
Thread-1 before7
Thread-0 after 6
Thread-0 before6
Thread-1 after 5
Thread-1 before5
Thread-0 after 4
Thread-0 before4
Thread-1 after 3
Thread-1 before3
Thread-0 after 2
Thread-0 before2
Thread-1 after 1
Thread-1 before1
Thread-0 after 0
Thread-1 after 0


例:1.8.2_c-本章源码

class BookMark_to_win {
    void onlySellOne() {
        int bookNum=10;
        while (bookNum > 0) {
            System.out.println(Thread.currentThread().getName()
                    + " before" + bookNum);
            bookNum--;
            try {
                Thread.sleep(1000);
            } catch (Exception e) {
            }
            System.out.println(Thread.currentThread().getName()
                    + " after " + bookNum);
        }
    }
}
class MyThread extends Thread {
    BookMark_to_win book;
    MyThread(BookMark_to_win tmp) {
        this.book = tmp;
    }
    public void run() {
            book.onlySellOne();
    }
}
public class Test {
    public static void main(String[] args) {
        BookMark_to_win bookM = new BookMark_to_win();
        Thread t1 = new MyThread(bookM);
        Thread t2 = new MyThread(bookM);
        t1.start();
        t2.start();
    }
}

输出结果:

Thread-0 before10
Thread-1 before10
Thread-0 after 9
Thread-0 before9
Thread-1 after 9
Thread-1 before9
Thread-0 after 8
Thread-0 before8
Thread-1 after 8
Thread-1 before8
Thread-0 after 7
Thread-0 before7
Thread-1 after 7
Thread-1 before7
Thread-0 after 6
Thread-0 before6
Thread-1 after 6
Thread-1 before6
Thread-0 after 5
Thread-0 before5
Thread-1 after 5
Thread-1 before5
Thread-0 after 4
Thread-0 before4
Thread-1 after 4
Thread-1 before4
Thread-0 after 3
Thread-0 before3
Thread-1 after 3
Thread-1 before3
Thread-0 after 2
Thread-0 before2
Thread-1 after 2
Thread-1 before2
Thread-0 after 1
Thread-0 before1
Thread-1 after 1
Thread-1 before1
Thread-0 after 0
Thread-1 after 0

例:1.8.2_d-本章源码

class BookMark_to_win {
    int bookNum=10;
    void onlySellOne() {
        if (bookNum > 0) {
            System.out.println(Thread.currentThread().getName()
                    + " before" + bookNum);
            bookNum--;
            try {
                Thread.sleep(1000);
            } catch (Exception e) {
            }
            System.out.println(Thread.currentThread().getName()
                    + " after " + bookNum);
        }
    }
}
class MyThread extends Thread {
    BookMark_to_win book;
    MyThread(BookMark_to_win tmp) {
        this.book = tmp;
    }
    public void run() {
    
        while (book.bookNum>0) {
            book.onlySellOne();
        }
    }
}
public class Test {
    public static void main(String[] args) {
        BookMark_to_win bookM = new BookMark_to_win();
        BookMark_to_win bookM2 = new BookMark_to_win();
        Thread t1 = new MyThread(bookM);
        Thread t2 = new MyThread(bookM2);
        t1.start();
        t2.start();
    }
}

输出结果:

Thread-0 before10
Thread-1 before10
Thread-1 after 9
Thread-0 after 9
Thread-0 before9
Thread-1 before9
Thread-1 after 8
Thread-1 before8
Thread-0 after 8
Thread-0 before8
Thread-1 after 7
Thread-1 before7
Thread-0 after 7
Thread-0 before7
Thread-1 after 6
Thread-1 before6
Thread-0 after 6
Thread-0 before6
Thread-0 after 5
Thread-0 before5
Thread-1 after 5
Thread-1 before5
Thread-1 after 4
Thread-1 before4
Thread-0 after 4
Thread-0 before4
Thread-1 after 3
Thread-1 before3
Thread-0 after 3
Thread-0 before3
Thread-0 after 2
Thread-0 before2
Thread-1 after 2
Thread-1 before2
Thread-0 after 1
Thread-0 before1
Thread-1 after 1
Thread-1 before1
Thread-1 after 0
Thread-0 after 0


例1.9.1-本章源码

class Photoshop {
    private Photoshop() {
    }
    private static Photoshop photoshop = null;
    public synchronized static Photoshop getInstanceQixy() {
        if (photoshop == null) {
            photoshop = new Photoshop();
        }
        return photoshop;
    }
}
class MyThreadMark_to_win extends Thread {
    public void run() {
        Photoshop photoshopI1 = Photoshop.getInstanceQixy();
        System.out.println(Thread.currentThread().getName() + "实例是 "
                + photoshopI1);
    }
}
public class Test {
    public static void main(String[] args) {
        MyThreadMark_to_win mt1 = new MyThreadMark_to_win();
        MyThreadMark_to_win mt2 = new MyThreadMark_to_win();
        mt1.start();
        mt2.start();
    }
}

输出结果:

Thread-1实例是 Photoshop@a62fc3
Thread-0实例是 Photoshop@a62fc3


例1.9.2-本章源码

class BookMark_to_win {
    int bookNum=10;
    synchronized void onlySellOne() {
        if (bookNum > 0) {
            System.out.println(Thread.currentThread().getName()
                    + " before" + bookNum);
            bookNum--;
            try {
                Thread.sleep(1000);
            } catch (Exception e) {
            }
            System.out.println(Thread.currentThread().getName()
                    + " after " + bookNum);
        }
    }
}
class MyThread extends Thread {
    BookMark_to_win book;
    MyThread(BookMark_to_win tmp) {
        this.book = tmp;
    }
    public void run() {
   
        while (book.bookNum>0) {
            book.onlySellOne();
        }
    }
}
public class Test {
    public static void main(String[] args) {
        BookMark_to_win bookM = new BookMark_to_win();
        Thread t1 = new MyThread(bookM);
        Thread t2 = new MyThread(bookM);
        t1.start();
        t2.start();
    }
}

输出结果:

Thread-0 before10
Thread-0 after 9
Thread-0 before9
Thread-0 after 8
Thread-0 before8
Thread-0 after 7
Thread-0 before7
Thread-0 after 6
Thread-1 before6
Thread-1 after 5
Thread-1 before5
Thread-1 after 4
Thread-0 before4
Thread-0 after 3
Thread-0 before3
Thread-0 after 2
Thread-0 before2
Thread-0 after 1
Thread-0 before1
Thread-0 after 0


例1.9.3-本章源码

class A {
    public synchronized void f1() {
        for (int i = 0; i < 3; i++) {
            try {
                Thread.sleep(1000);
            } catch (Exception e) {
            }
            System.out.println("i = " + i);
        }
    }
}

class MyThread extends Thread {
    A a;

    public MyThread(A a) {
        this.a = a;
    }
    public void run() {
        a.f1();
    }
}

public class TestMark_to_win {
    public static void main(String[] args) {
        A a = new A();
        Thread t1 = new MyThread(a);
        Thread t2 = new MyThread(a);
        t1.start();
        t2.start();
    }
}

运行结果是

i = 0
i = 1
i = 2
i = 0
i = 1
i = 2

假如你去掉了关键字"synchronized"

结果就变成了
i = 0
i = 0
i = 1
i = 1
i = 2
i = 2


例1.9.4_a-本章源码

class A {
    public void disp() {
        System.out.println("新线程启动:");
        for (int i = 0; i < 10; i++) {
            System.out.println(i);
            try {
                Thread.sleep(500);
            } catch (Exception e) {
            }
        }
    }
}

public class TestMark_to_win extends Thread {
    A a;

    public TestMark_to_win(A a) {
        this.a = a;
    }

    public void run() {
        a.disp();
    }

    public static void main(String[] args) {
        A a = new A();
        TestMark_to_win t1 = new TestMark_to_win(a);
        TestMark_to_win t2 = new TestMark_to_win(a);
        t1.start();
        t2.start();
    }
}


运行结果是:

新线程启动:
新线程启动:
0
0
1
1
2
2
3
3
4
4
5
5
6
6
7
7
8
8
9
9


例1.9.4_b-本章源码


class A {
    public void disp() {
        synchronized (this) {
            System.out.println("新线程启动:");
            for (int i = 0; i < 10; i++) {
                System.out.println(i);
                try {
                    Thread.sleep(500);
                } catch (Exception e) {
                }
            }
        }
    }
}

public class TestMark_to_win extends Thread {
    A a;

    public TestMark_to_win(A a) {
        this.a = a;
    }

    public void run() {
        a.disp();
    }

    public static void main(String[] args) {
        A a = new A();
        TestMark_to_win t1 = new TestMark_to_win(a);
        TestMark_to_win t2 = new TestMark_to_win(a);
        t1.start();
        t2.start();
    }
}

运行结果是

新线程启动:
0
1
2
3
4
5
6
7
8
9
新线程启动:
0
1
2
3
4
5
6
7
8
9


例1.10.1-本章源码

class DeadLockExam extends Thread {
    DeadLockExam d;

    synchronized void disp() {
        System.out.println("in di");
    }

    synchronized public void run() {
        System.out.println("in ru");
        try {
            Thread.sleep(1000);
        } catch (Exception e) {
        }
        d.disp();
    }
}

public class TestMark_to_win {
    public static void main(String[] args) {
        DeadLockExam d1 = new DeadLockExam();
        DeadLockExam d2 = new DeadLockExam();
        d1.d = d2;
        d2.d = d1;
        d1.start();
        d2.start();
    }
}

运行结果是

in ru
in ru


例1.12.1-本章源码

import java.util.Timer;
import java.util.TimerTask;

class TimerExample {
    Timer timer;

    public TimerExample(int seconds) {
        timer = new Timer();
     
        timer.schedule(new ConcTask(), seconds * 1000);
    }

    // Inner class
    class ConcTask extends TimerTask {
      
        public void run() {
            System.out.println("时间到!");

        }
    }

}

public class TestMark_to_win {
    public static void main(String args[]) {
        new TimerExample(5);
        System.out.println("here");
    }

}

运行结果是

here
时间到!